and our new favourite part of the house
After the concrete subfloor was installed, we took a week off to start work on the next layers of the floor and drainage plan. This would prepare us for the installation of screed, completing arguably the most complex portion of the renovations. The next “layer” in this plan would be fitting the cavity membrane that we have been storing for months. To prepare for that, we first needed to smooth out horizontal strips of our bumpy stone walls, by rendering them; if the walls weren’t roughly flat, the fixing plugs wouldn’t make a good seal, and our membrane would leak. We also needed to waterproof the channels so that the water would flow away, and into our new drains, rather than soak into the concrete.
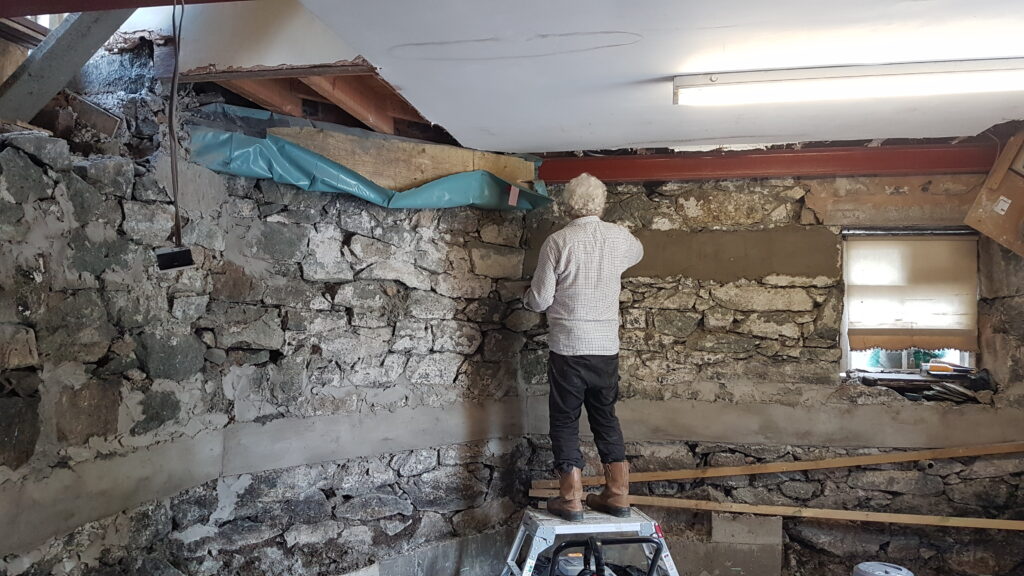
Ethan’s dad used the horizontal wood we attached to the walls previously to render a lower render strip. For the upper strip he decided to freehand after realising that the wood ‘template’ was more hassle than help. In most areas the cavity membrane was only being installed downstairs. We could take the risk of a couple of unsealed holes near the top of the membrane, as they would only be a few centimeters below the top and there should be no need for waterproofing above this point. This negated the need for an upper render strip on all but the kitchen walls, which are particularly wet in winter. The picture shows the dried lower strip, and Ethan’s dad in the process of applying the upper strip in the kitchen.
Over the course of the previous activities, Ethan had begun to develop a bad knee. One of us clearly has to be injured at all times, or perhaps we both have to learn to be more careful. After having an appointment with a physio, he was told that it was in fact a bad back – likely caused by a mixture of working on the house, sitting at a desk, being swamped by my nieces and nephews on a trampoline and an overconfident attempt at a return to running – which involved a particularly steep hill.
We were dubious about this diagnosis, given the concentrated nature of the pain in his knee. However, the prescribed treatment was regular back stretches and the pain should improve within days. Given that the alternative would have been a damaged tendon or ligament which could take weeks to improve and we had lots to still do on the house, let alone that Ethan was due to be best man at a wedding in a few days, with all the movement that that entails, we had our fingers crossed that she was right. After performing the stretches as instructed on the dusty concrete floor (insisting on still soldiering on and working on the house), the knee pain began to improve significantly. Lesson learned: referred pain is really convincing.

One part of the work that continued while Ethan was in pain was the waterproofing of the drainage channels. We ordered some cement-based waterproofer. This waterproofer was to be mixed with water and wanted to be applied to damp concrete. After that, it needed to remain damp, but not wet, for 5 days. As we have a fairly constant flow of water entering the channels from a couple of areas in the wall, we decided to rig up a diversion for the water. We used spare pieces of guttering and containers found in the shed, and lots and lots of kitchen roll. The containers required regular emptying over the following days, and sometimes overflowed onto the new concrete if we didn’t do so often enough.
We mixed the waterproofer in a large bucket using a mixer attachment on a drill. We thought we had been quite precise about the quantities, mixing half a bag with the exact amount of water required to get the strength we desired. Ethan painted the mixture onto the sides and bottom of the channels with relative ease, due to its workable consistency. It was only when we mixed the 2nd half of the bag with the same amount of water and it remained almost solid, that we realised our first mix had in fact used much less than half the bag – probably due to settling in the bag making the lower half a lot more dense. So we added more water – in a much less measured way this time – to achieve a usable mix. Ethan painted on the 2nd layer, and I inspected using a lamp to ensure that there were no lumps or bumps where water may get trapped. Thankfully, when all was dry, the channels appeared to be successfully retaining the water.

Around this time was when we received a phone call letting us know that the windows had been provisionally booked in to be installed on the 20th of September. We still had a garage door where there should be a wall in which one of these windows would be installed. The installation date being 7 weeks away at the time, we thought we’d better put more pressure onto sorting that. We had been waiting for about six weeks since a stone worker had told us he would give us a quote shortly, and that he could get it done fairly quickly. Every couple of weeks we received a “I haven’t forgotten about you” text – only to be promptly forgotten by him again. So we again asked for stone worker recommendations on a local facebook group and contacted some. One came and quoted.
Then Ethan wrote a speech and we headed off to the wedding. Congratulations Alex and Sarah! It was a nice change to swap our dusty clothes for a suit and a dress, and to be away from the demands of the house. For me, it was a fun and relaxing couple of days. Ethan had best man duties to attend to, but, you know what they say: a change is as good as a rest, and he at least had a rest from heavy lifting.
Unable to ever fully switch off from the house, we had decided to hire the new stone worker while at the wedding. He would be available to complete the work the following week. This gave us 5 days of our remaining time off from when we returned to remove the garage door and build the inner skin of this wall so that he could clad it in stone.
When we returned, we got to work:
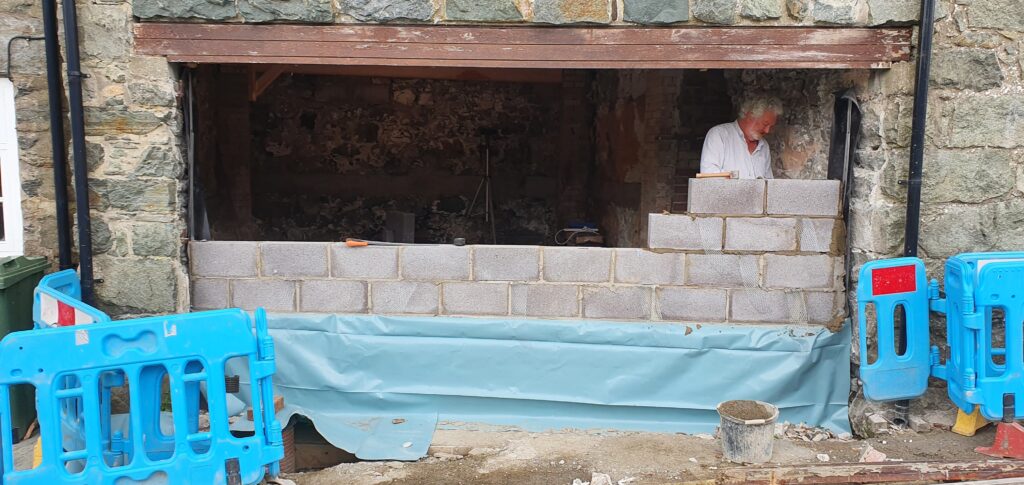
Due to the weather, and really not wanting to fill our new channels, and our lungs with concrete dust, Ethan made a tarpaulin tent to cut concrete wall blocks underneath. Not the most comfortable position to be grinding in. We reached the level of the bottom of the new window opening, then we waited until dark. Using a laser level we carefully marked on our concrete wall where the new opening should be so that it would sit exactly below the window on the 1st floor. We then added a few centimetres extra on each side to allow for insulation and built the opening accordingly.
Before the wall could be completed, we needed to prep the beams above it. The wall above the garage door opening is supported by two RSJs which, by modern standards, are under-specced for an opening of that width. Add to this some barely-there concrete pads supporting their ends, and this has resulted in some slight movement and cracking in the adjoining walls over the years. As we were shortening the span of the opening the structural engineer was happy was for us leave the beams in place and have the new wall provide some additional support.
However, both RSJs were looking a little worse for wear, with some dirt and rust, so we made the decision to rub them down and paint them in Hammerite metal paint – meant for painting over and protecting from further rust. What I have learnt from this experience: Hammerite gets EVERYWHERE. My first mistake was initially forgetting to wear gloves, so my hands were quite covered. However, when I got home I realised my real mistake was not wearing a full quarantine-style, plastic over suit. The Hammerite had soaked through our clothes leaving black splodges on my underwear and our skin. The stuff on our skin took weeks to wash off, and the underwear – I’m fairly certain is permanently stained. I did develop a technique to minimise dripping, but this clearly occurred a lot too late in the process.

Uncovered: dirty and rusty RSJ 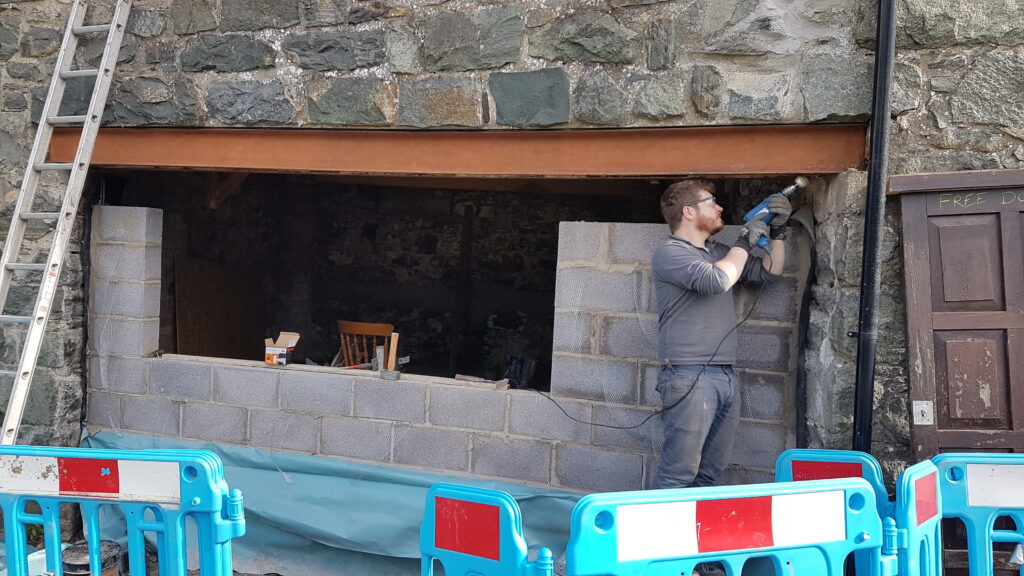
Ethan giving the RSJ a rub down
One of the RSJs showing sections before and after rubbing down:

One day, planning to prepare the RSJs, we arrived to a very wet wall and floor in one of the few corners of the house where we had not created channels, and did not plan on installing cavity membrane. This was stressful, very stressful. After investigation, we found that next door’s gutters were in much the same state as ours had been in January, i.e. blocked, and functioning more as a conduit to send all the water to one overflow position that poured against the house. During a downpour their gutter had directed all the water coming off their roof into our adjoining wall. Although it didn’t feel lucky at the time, I suppose having it happen before we have installed more water-sensitive layers, such as insulation, was just that. As the house next door had just been sold, and we hadn’t made contact with the new owners – we decided to just go ahead and clear the gutter – it went with a bang, spraying a down-pipe full of water and rotten leaves at us. But the following days the floor inside looked drier and drier. In future, we will keep an eye on that gutter whenever we inspect our own!
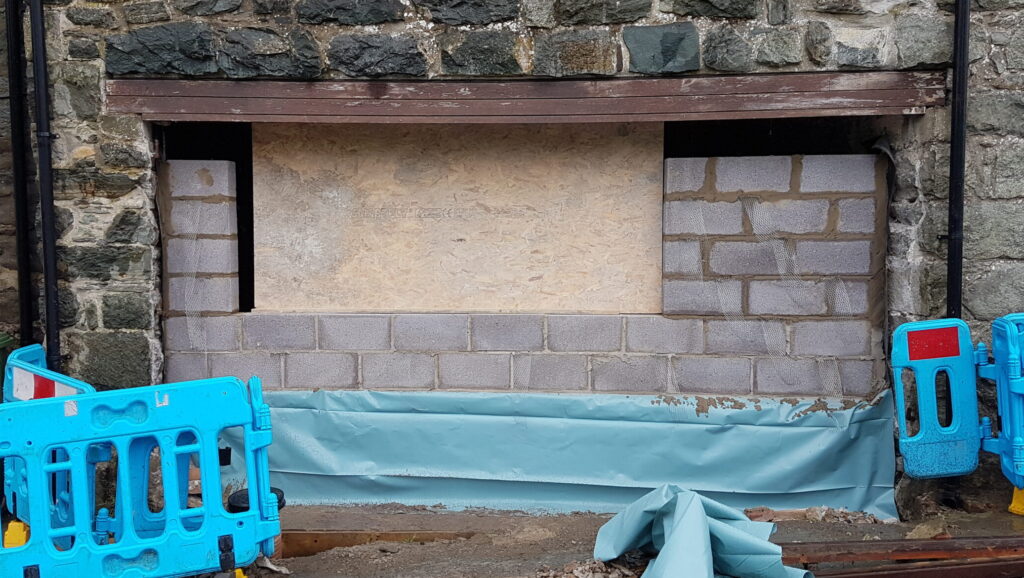
Here’s a picture of the freshly hammerite-ed RSJ with the completed inner skin complete and in contact:

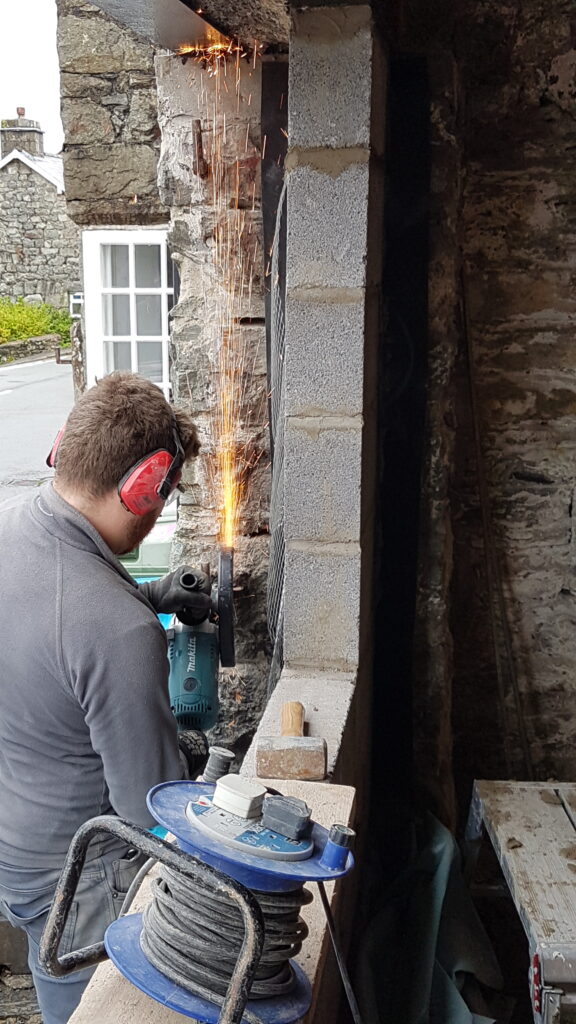
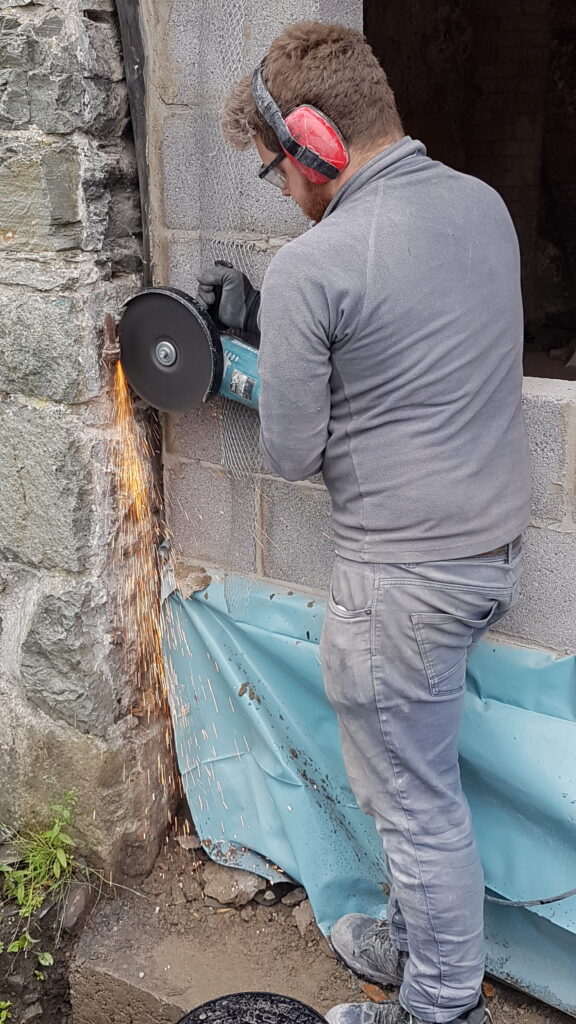
After the inner skin was finished, the final preparation before the stone worker could begin was to remove the old chunky metal hinges. They were stubborn and would not be removed by hitting or pulling, so had to be cut back using the grinder – which created some fun fireworks:

When the stone worker started on our new stone wall, we were both nervous. This wall would make or break the look of the whole front of the house and we had previously had trouble finding workers who had the same ‘vision’ as us for our house (read: cared). We both had work so had to wait until the very end of the first day to go to have a look. As we drove past the house to park, the new wall was mostly covered in a membrane draped over it for protection, but we both got a peek at a small uncovered section; and were immediately excited. Only 2 or 3 stones were visible, but it looked so right. We were even more pleased when we took a look under the membrane; all the stones had been thoughtfully chosen and placed, and the progress was good.


He was using stones that we had removed from the internal walls of the house when we made the doorways. He had warned us that at some point in the process he may run out of suitable stones. To us, this seemed quite likely. This wall required a lot of flat faces, as well as right angles around the window, and the pile of stones looked quite irregular. So when Ethan received a call from the stone worker while he was in a meeting, I was less than excited to answer. However, what he actually called to tell us was that the instructions that we had given him of where to build the opening for the window was about 7 cm out from being directly below the one above. We were confused about how this could have happened, but as he was the professional, we took the risk and decided to let him do whatever he thought was best – and we are SO glad we did:

It was so in line! After the RSJ cladding and us adding a window sill:

He is the first person we have hired who has actively solved problems and seemed to care about what the house will look like when it is finished. He saved us from having obviously wonky windows. He chipped back the corners of the ugly concrete pads so they don’t look as severe or obvious. He also clad the RSJ so well that we often forget just how long the RSJ is now. We are big fans of his work!
Just look at it. Has there ever been a more gorgeous wall? It almost looks like its always been there. It still needs pointing, and a very particular piece of slate to clad the RSJ, but it’s given us back some enthusiasm and optimism. Our house might actually end up pretty!

Tune in next week for a return to our regularly scheduled crushing defeat.
Yaaaaaaaay. It looks fantastic. So pleased for you both. Xx
Thanks! Still a long way to go inside. But the outside (front) is almost there! Xx