To give you an idea of just how behind we are on keeping you up to date, the last blog (of the soakaway saga) was set over the spring bank holiday weekend, and the foundation was poured on the 1st of June. Nine weeks have passed since then, and things have happened. Luckily, (for you, not for our progress) we mostly only have evenings and weekends to work on the house, so progress comes in bursts. This post should bring you a fair bit closer to present day, at least in terms of where we are with the never-ending job of the floors and drainage.

After the foundation was poured under the existing garage door, we began to build the wall to replace it. The wall will be one skin of concrete block internally, and a stone skin on the outside – hopefully matching the rest of the house, and built by someone else. It will also contain a hole for a window to eventually be installed. As we wanted to concentrate on floor installation, we built only 2 courses of concrete block. These couple of layers give us enough wall height in the garage to allow the first few layers of the floor, up to the top of a new concrete slab, to be contained.
Our beautiful new foundation and concrete block:

This eye sore is right on the road for all to see – I’m sure our neighbours absolutely love us.
The plan
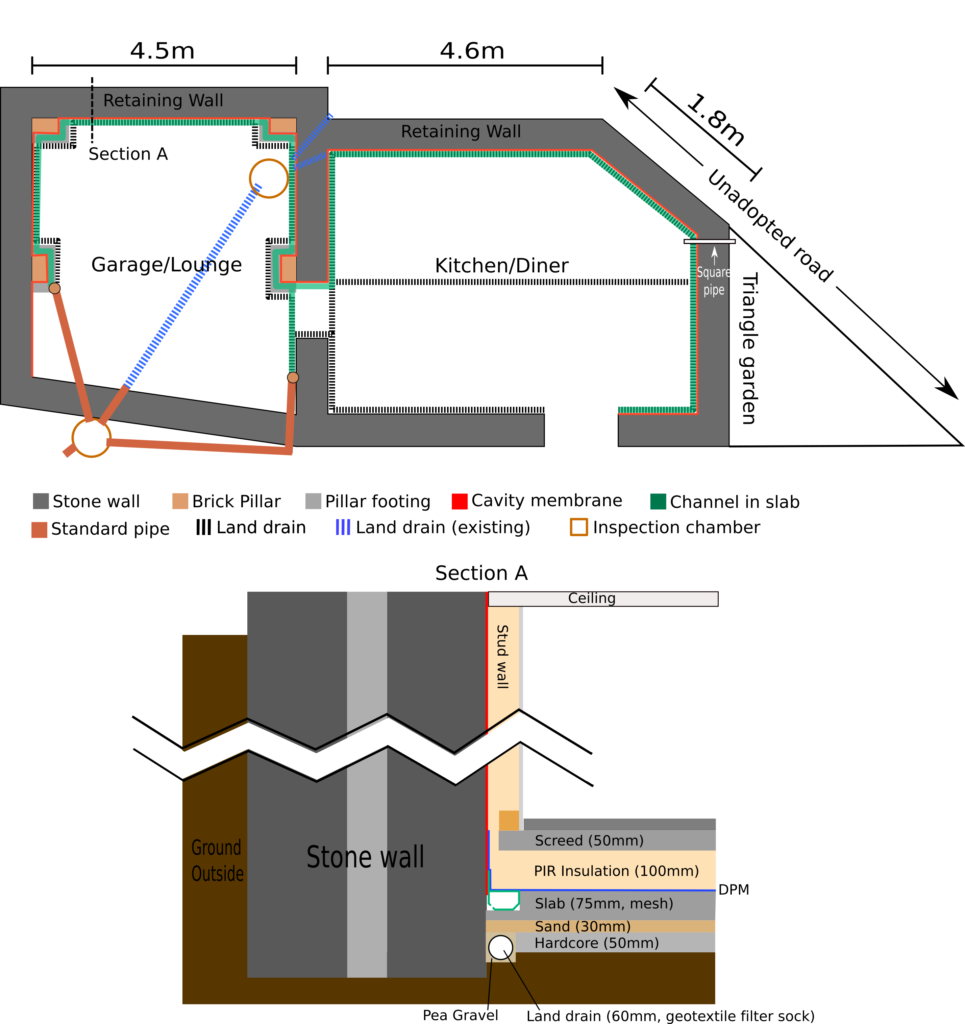
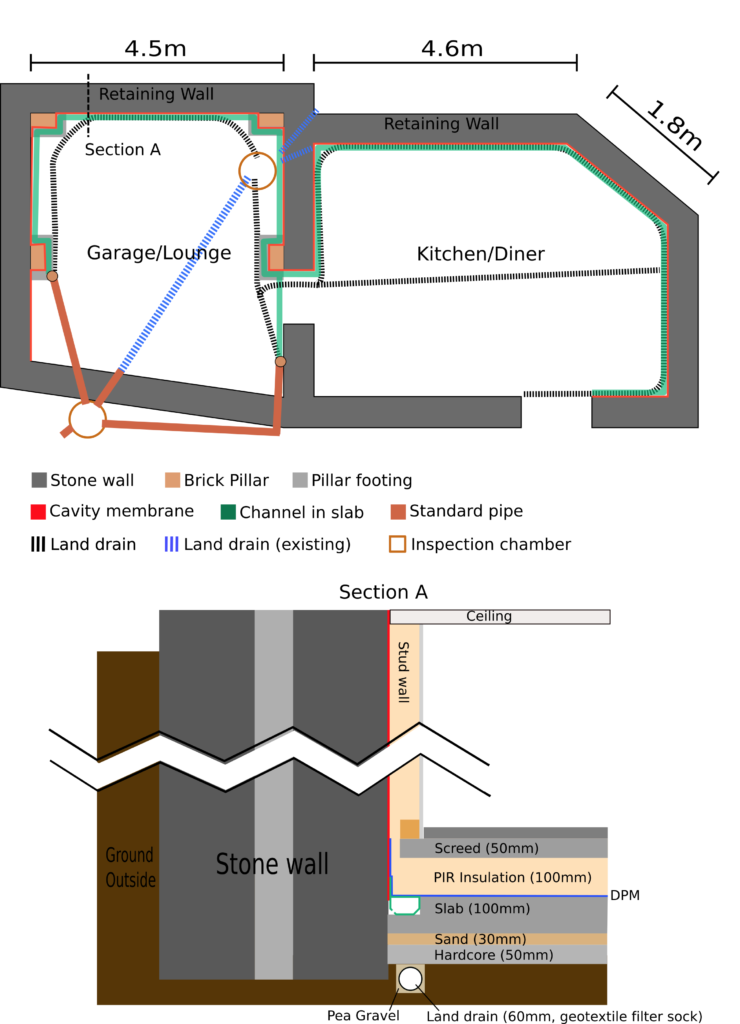
Now that we have the wall to contain the floors, the goal is to get the inside of the house to the point where the layers of the floor can be built up. Here is a plan of the ground floor, containing our plan for the drainage layout, and a cross-section of the intended floor layers at the back (underground) wall. It might help show what the hell we are trying to achieve!
Hardcore is the next job to be done by someone else. This means we need to deal with the water on the muddy floor, and more effectively contain the existing drain hole at the back of the garage, so that we can book someone in.
As you can hopefully see from the diagrams, the basic plan is to have a french drain around the perimeter of the interior walls under the whole floor structure. This should help clear the water that is already sat in the house. Once the final floor structure is installed, most of the water should be dealt with a new drainage channel recessed into the concrete slab. The channel and exit points will be accessible and maintainable in case of a blockage. Even with all this in place, building control aren’t so convinced that the house will end up dry enough, so that makes us nervous.
However, we have had two damp proofing companies take a look and told us that drainage channels in the slab with cavity membrane on the walls was the way to go, and this should solve our damp issues. So the french drain is just a bonus back up really. We have to keep reminding ourselves that the house was previously drained using a couple of pieces of guttering covered in some damp proof membrane, and the only area that seemed to have significant water was where they just hadn’t bothered with any kind of solution. So this double layer of drains really should be overkill for the amount of water we are seeing.
The hold up
Before we could start digging to install the french drains we still had a small portion of underpinning that was required before our walls could be fully trusted to stay where they were. In the meantime, we used our new trusty hoover to attempt to remove the worst of the silt and water from our muddy kitchen floor.

Given how long it has taken to get anyone in to do any job, we were pleasantly suprised that the remaining underpinning was underway two weeks after the need for it had been discovered. The additional underpinning was around one of the existing drainage points, that we intended to keep – the more drainage points the less likely anything would end up fully blocked and the less water would be hanging around in our floors. The pipe of this drainage point had been broken when the floors were dug out and as the wall was undermined for the underpinning, it turned out that it was broken quite far into the wall. The pipe needed blocking, fully replacing, or a new piece of pipe to be connected. Of course, the previous owners who installed this pipe thought it best to use a piece of square guttering downpipe, leaving us searching for a water tight connector or end cap that simply does not exist.
The external end of this pipe was also a mystery. On the other side of the wall is our small triangle garden, and an unadopted road that is much higher than our internal floor levels. As we had not yet dug deep enough in the garden to find any pipes, we would have to wait to determine how or if they had actually managed to connect this pipe to the outgoing system, or if it just dumped the water into the ground outside.
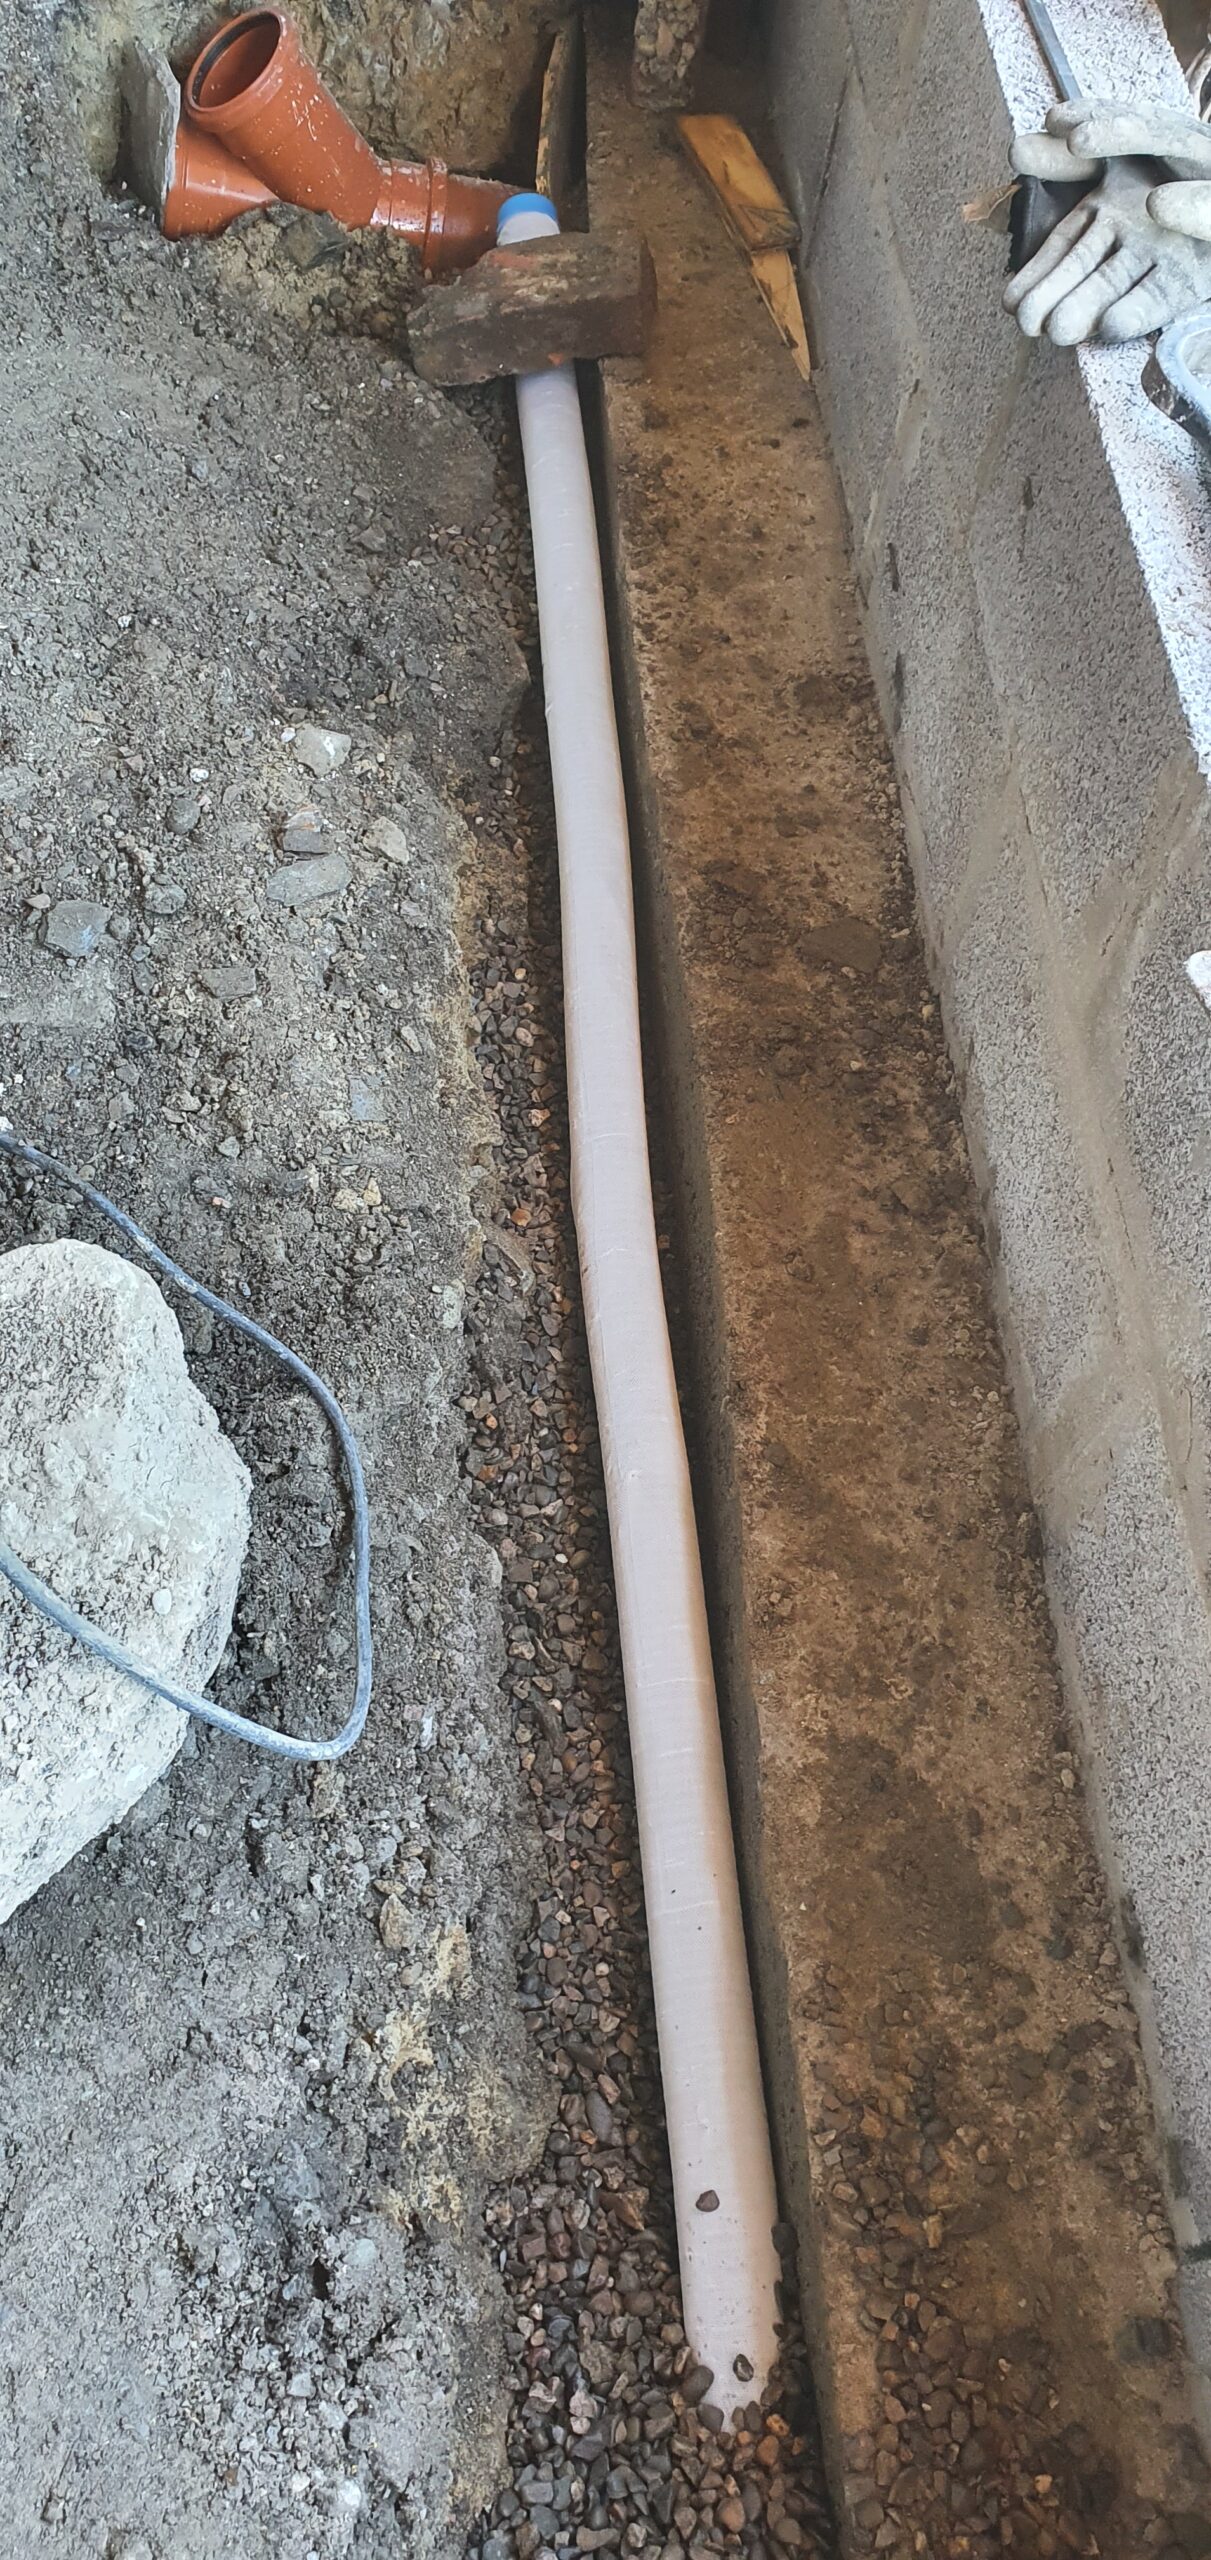
So, while the groundworkers waited, we frantically spent time scouring the builders merchants trying to decide how we could best replace this pipe. After quizzing a member of staff, we eventually decided to buy the biggest waste pipe that would fit into the square pipe, and push it all the way through the wall, as far as we could into the guttering. This might give us the opportunity to later connect this pipe on the outside properly to the outgoing system. We would then squirt a lot of sealant into the square pipe and hope that nothing came back up the pipe.


The pit
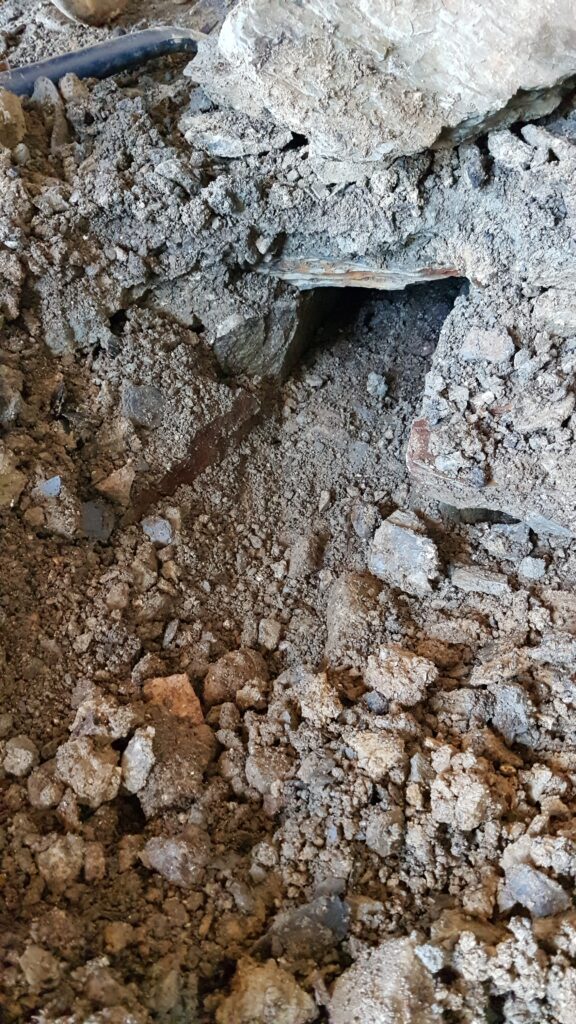
After the groundworkers had finished the underpinning, they spent some time digging in the triangle garden on the other side of the wall. The brief was to dig as deep as they could without causing a landslide on the unadopted road next to it. They found a large pipe running along the wall, likely the pipe that transports all the bathroom and gutter waste from the back of the property and the joint of the kitchen sink waste pipe. To reach the square pipe would have likely been pushing it. So that will be dealt with later! We’ve already created enough of a hazard for our neighbours for the time being. It’s hard to see the depth, but its a good few foot drop to the bottom of our excellent new pit and it’s a struggle to climb down there:

French drains
Once the underpinning was in and set, we got started on the french drains. Ethan and I took a week off work, knowing that the drain would take longer than a weekend. We were also having to move out of our rental property the following week, so it would be useful to have some additional packing and moving time. Another relaxing holiday.
Digging the channels was a job predominantly completed by Ethan and his dad. I had a multitude of excuses: my back was still bad; my confidence with a pick axe was particularly low; and previous to the purchase of this house I was unaware that shovelling was a skill that required honing, and that technique is actually really important, as such my shovelling speeds left a lot to be desired, and my efforts were best spent on the supervising and packing front.
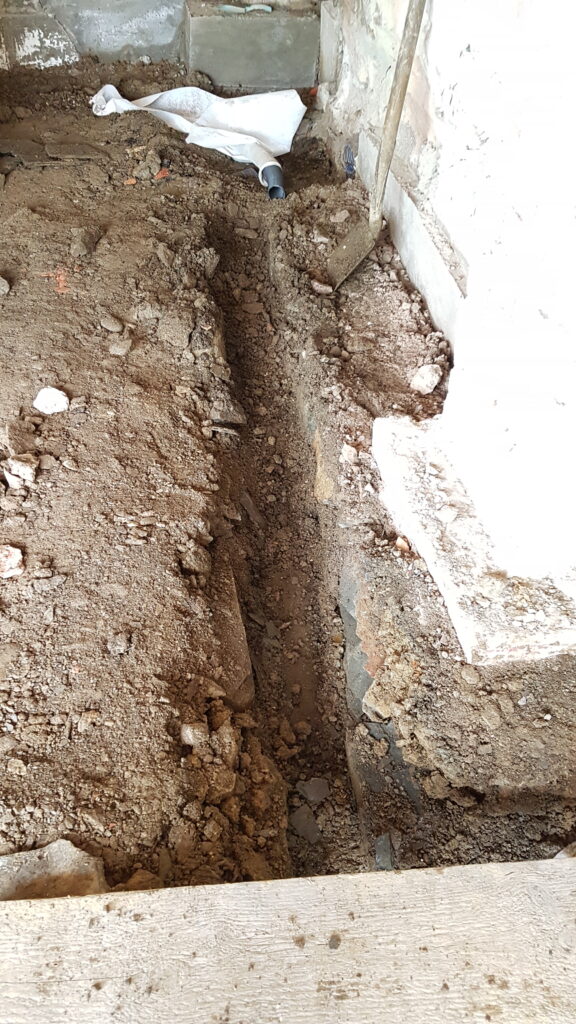
We had only had underpinning to a certain depth in the floor, meaning that digging any deeper close to the walls was ill-advised. While the groundworker had managed to get a little extra depth out of the floors, we had allocated this to simplifying and strengthening our concrete sub floor, by increasing its thickness, and removing the need for reinforcing mesh. We had therefore planned to dig very minimal trenches, just deep enough to allow the french drain pipe to be surrounded with the standard pea gravel. The top of the pea gravel would be at the same depth as the top of hardcore. The hardcore requires whacking to compact it together to create a strong and stable base for the concrete subfloor. Pea gravel, however is not compactable by design and so we suspected it should not be whacked, particularly as the pipe may not stand up to it either. So we would need to place the minimal trenches and pipes as close to the wall as possible, ensuring all the new hardcore could easily be whacked. We had bought many connectors for the pipe so that every corner could be a right angle, right up against the walls.
Then, we had a communication error. After starting the job, we were convinced by Ethan’s dad that we could in fact whack the pea gravel, and it would be fine, so it wasn’t worth keeping the pipe so close to the walls in the corners, and we may as well utilise the flex in the pipe to tackle the corners in a more sweeping manner. So that’s what we went for. After a days work, having dug a trench and laid one pipe, we went home for a well earned night’s sleep.
When we returned in the morning, the concerns begun. The issue had been that Ethan’s dad thought that the pea gravel would be under the hardcore layer. While we thought he knew it would not. So our miscommunication meant that all aspects of the previous days french drain had to be removed.
The new plan was then to dig the trenches further from the walls and a little deeper and make sure that the hardcore could be laid over the top and whacked. And so we proceeded.
Here are some instructions for laying a french drain, that are probably best not followed too closely:
- Make sure that you have underpinning installed to a depth that prevents you from digging trenches sufficiently deep to make installation at all easy.
- Dig a trench that is just about sloping in the direction you would like and is only deep enough for minimal pea gravel, and minimal error in laying of the pipe.
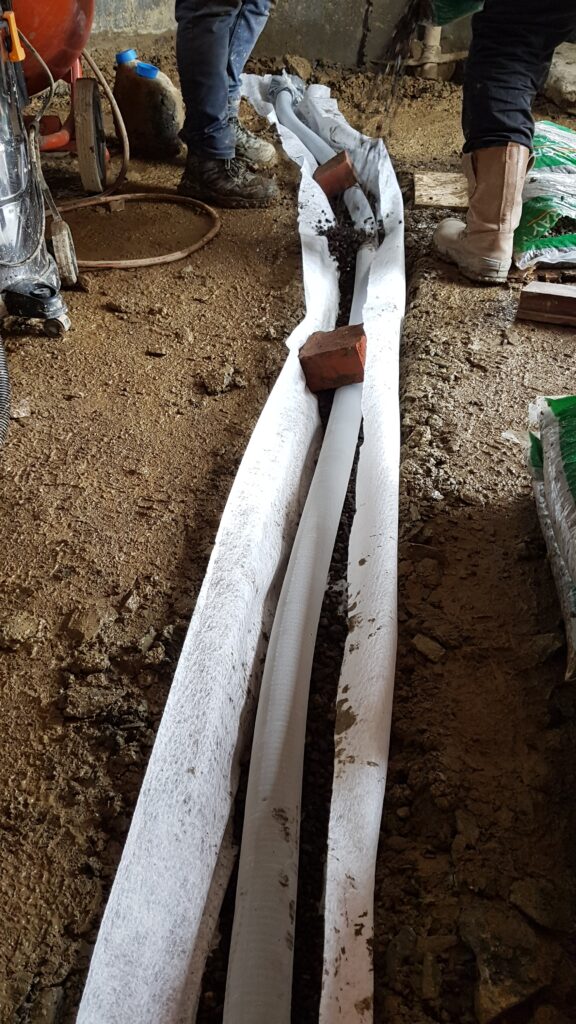
- To prevent mud and silt from blocking gaps in the pea gravel, lay a wide strip (but only JUST wide enough to meet itself when wrapping the pea gravel) of non-woven geo-textile along the trench. MUST be non-woven to prevent blockages – but I have no idea why.
- Try to hold the centre of the geo-textile in the centre of the trench while someone pours some gravel on top of it. Ensure you cover the inside of the geo-textile in mud as you go, because this is definitely not what it is intended to keep external.
- Put a geo-textile sock over the length of the perforated pipe because you just KNOW that the geo-textile you laid before probably won’t have any effect after the chaotic way in which you laid it.
- Lay the pipe into the trench and wiggle it a bit to try to make it slope in the correct direction, get bored, give up.
- Have someone hold the sides of the geo-textile up while you pour in gravel to surround the pipe because you didn’t cut it wide enough to actually contain the full trench of gravel.
- Ensure you move the geo-textile just enough so that the pipe lifts and negates all the positioning you did, and leaves the pipe at the top of the gravel in places anyway.
- At some point close the geo-textile over the pea gravel and pour more gravel on top to secure. Be quick to remove your hands when the gravel is poured, because gravel cascading on to the backs of your hands from a foot high hurts more than you’d expect.
- Repeat points 2-9 for several days.
While digging in the garage we found an old drainage solution in the form of a stone culvet from close to the garage access point to near the internal doorway. So we opened this up and put the french drain within instead of digging a new trench.
Inspection chamber
In addition to the french drains, we needed to find a way to cover the existing drain at the back of the garage. It needed to be water tight, preferably insulated, and accessible. This seemed to be a set of requirements that no-one had ever needed before. After many a breakdown, we managed to get some answers on a forum. Apparently, there is no standard way of including insulation in any kind of inspection chamber. So, we’ll just be having an access hatch in the screed level, with an inspection riser down to the drain, with a custom concrete base to allow access to all 3 pipes, and the all important brick on its side.
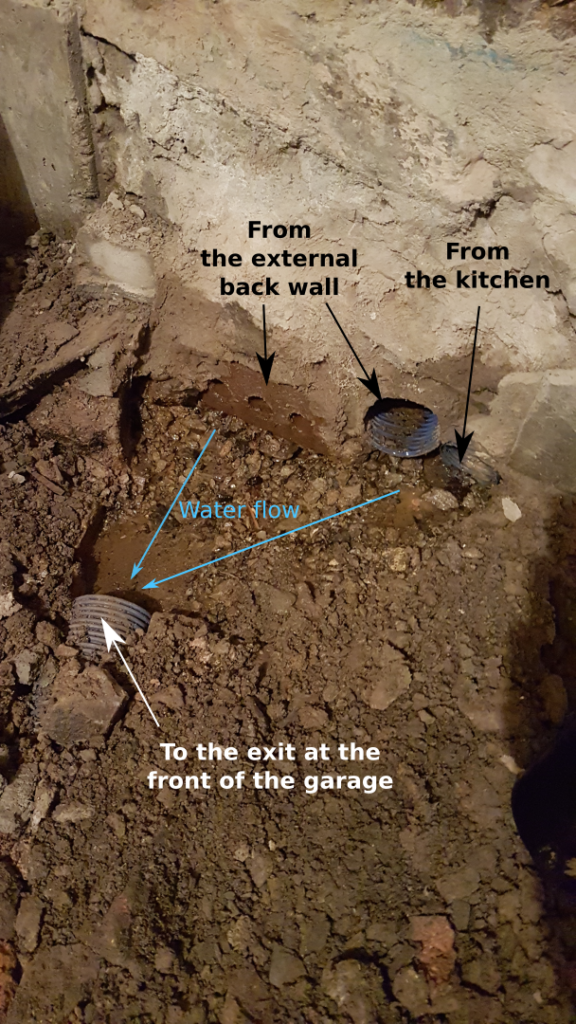
The only information we could find about the type of access hatch required was that it should be double sealed for internal use. Helpfully, not all websites use the same term, and the diameter of the inspection riser that each of the access hatches should interface with isn’t at all clear. We’ll then create a makeshift damp-proof-membrane-surrounded insulation “plug” to shove into the inspection riser. Hopefully this will insulate from both the cold, and the running water noises. The floor damp proof membrane will be brought up around the outside of the inspection chamber and secured with a large jubilee clip.
The first step to take in this solution was creating a concrete base. We had to go with a non-conventional shape to allow all pipes (and brick) to continue to discharge water, and to allow for a sturdy base on which the cylindrical inspection riser could sit. Additionally. we needed to leave space behind the access hatch for the in-concrete drainage channel to pass along the wall behind.
The former ended up being more complicated than it probably needed to be, but we wanted to make sure we could remove it easily once the concrete was set, and that we could be ready for the other layers of floor that would be added. We also had to interface with the french drain, creating holes on each side of the former to let the pipe pass through. One pipe discharging into the drain, and the other providing a back up exit, should it ever be required. We were quite proud of the resulting solution.


Result
Things didn’t go exactly according to plan, so here’s an update on the diagrams for what the new plan is. Essentially, what has changed is the positioning of the french drains in depth as well as layout. Due to the additional depth uncovered by the ground-worker, we have also been able to give extra thickness to our concrete slab, which gives us better thickness underneath the drainage channels. So hopefully they are more likely to survive now.
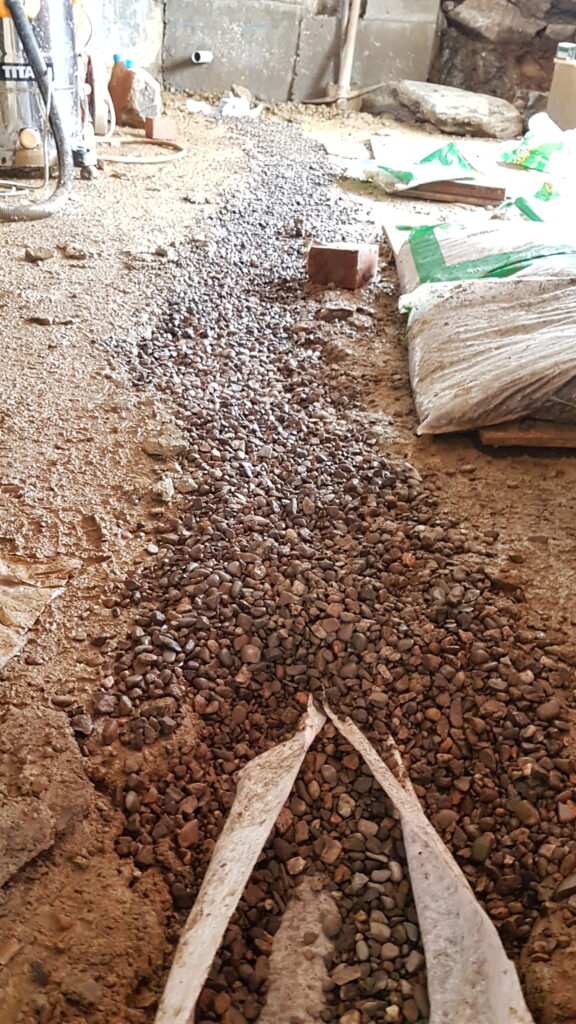
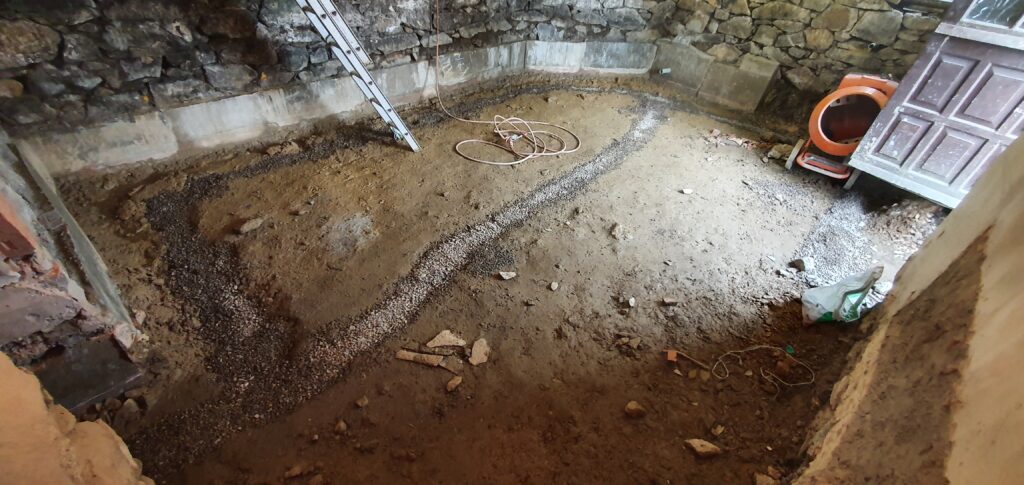
In real life, this looks like this at the french drain level:
Kitchen/diner 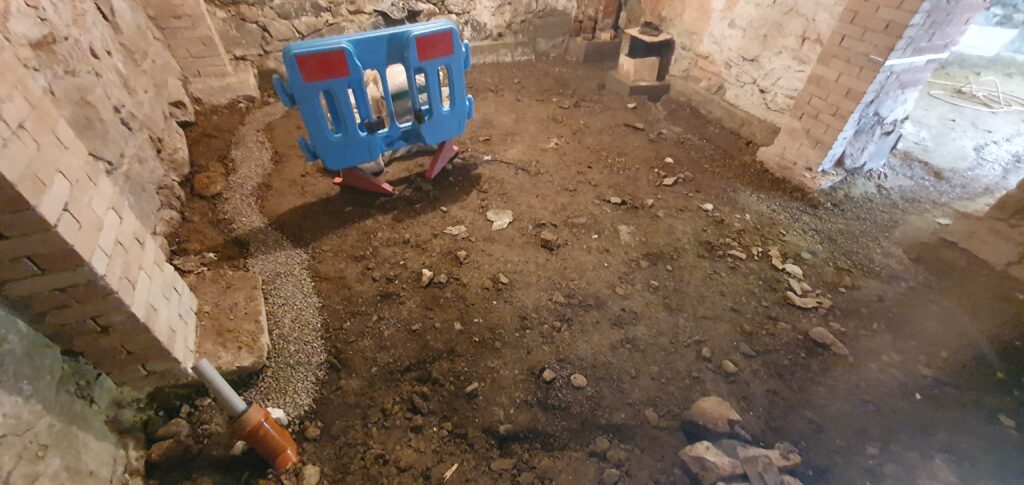
Garage/lounge
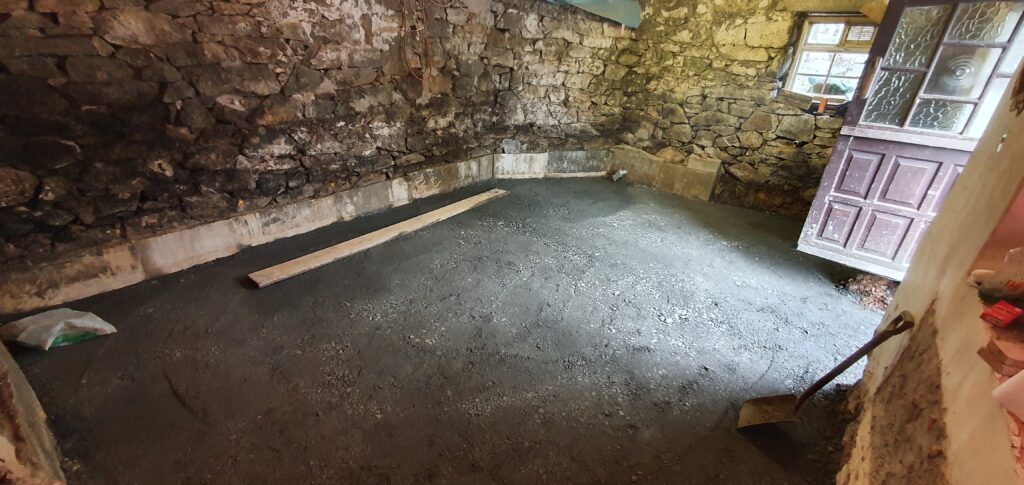
After the french drains were all in the mud was a bit less swamp like, and we were ready for hardcore. With our first grey hairs found (I think I may have found one of my own earlier in the project already), we had our fingers crossed for a short wait. We spent some days packing, moving and cleaning our rental property. Due to the state of the muddy floors, and only a ladder to get upstairs, we moved many of out boxes into our house via an upstairs window from the back garden. Precariously shuffling boxes along a scaffolding board over the hole where the stairs should be. The rest of our boxes went back to Ethan’s dad’s house, where we will also be until we have floors, doors and windows. On that note, after the 23rd of June, this is what those floors looked like:
Kitchen/diner 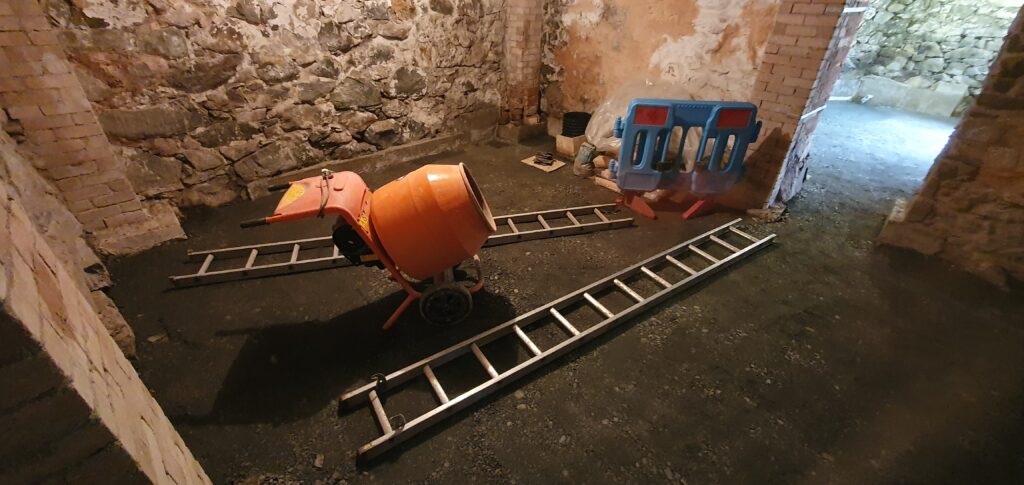
Garage/lounge
This is what happened with the floors before the 27th June. However, you’re not quite caught up to that date as I haven’t talked about windows. Be prepared for an almost parallel timeline in the next blog.
Have some bonus french drain pictures and a video of Ethan spraying some underpinning with milk (lime sealant – also apparently very important) while you wait:
Front of the garage 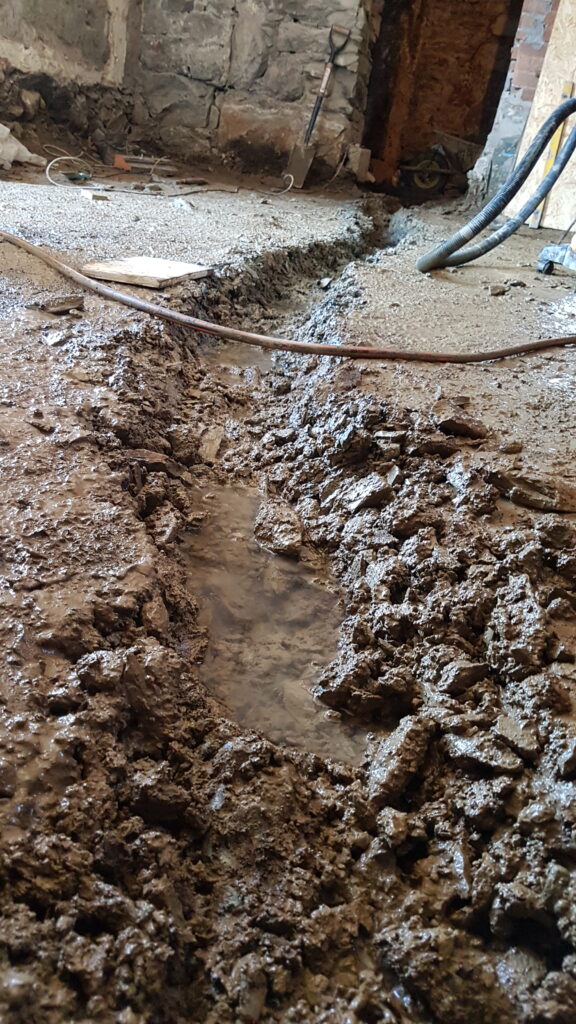
Kitchen 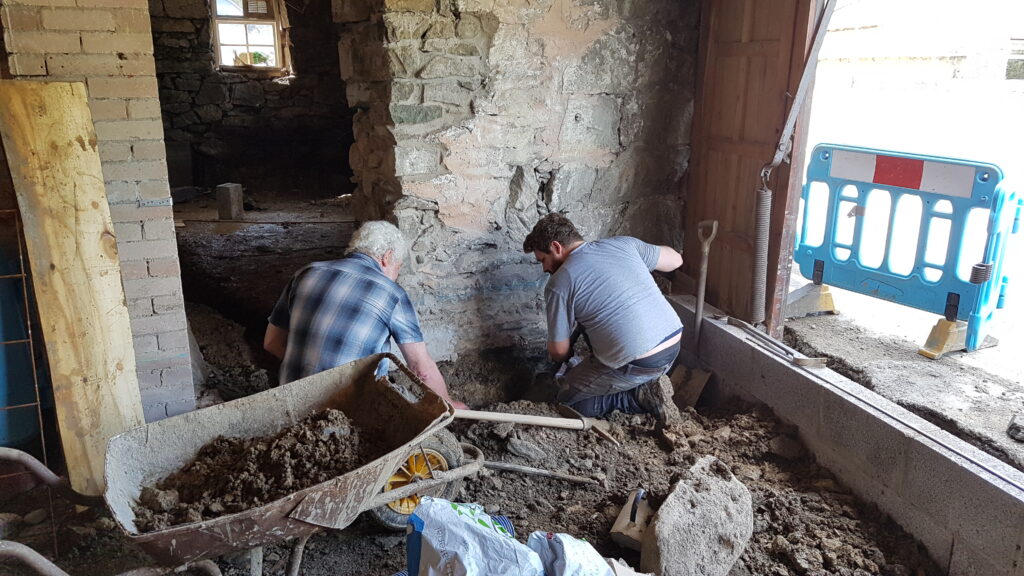
Front of garage 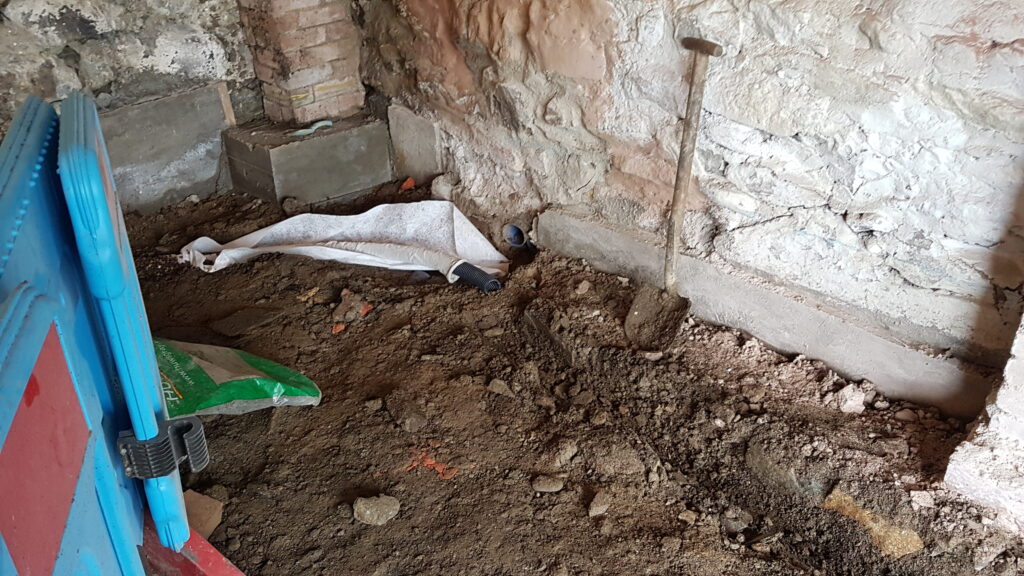
Side of garage/ existing drain 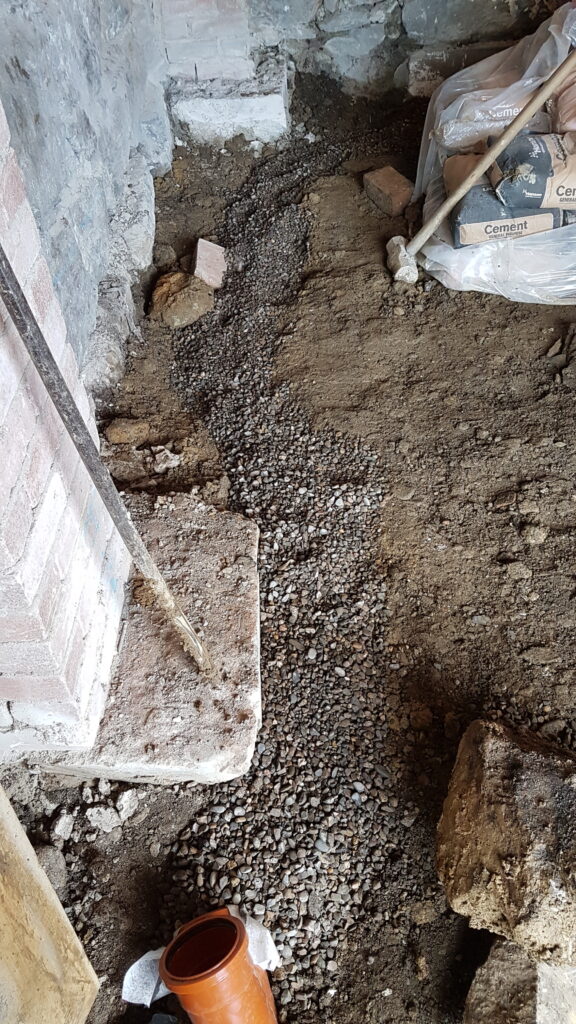
Side of garage towards back 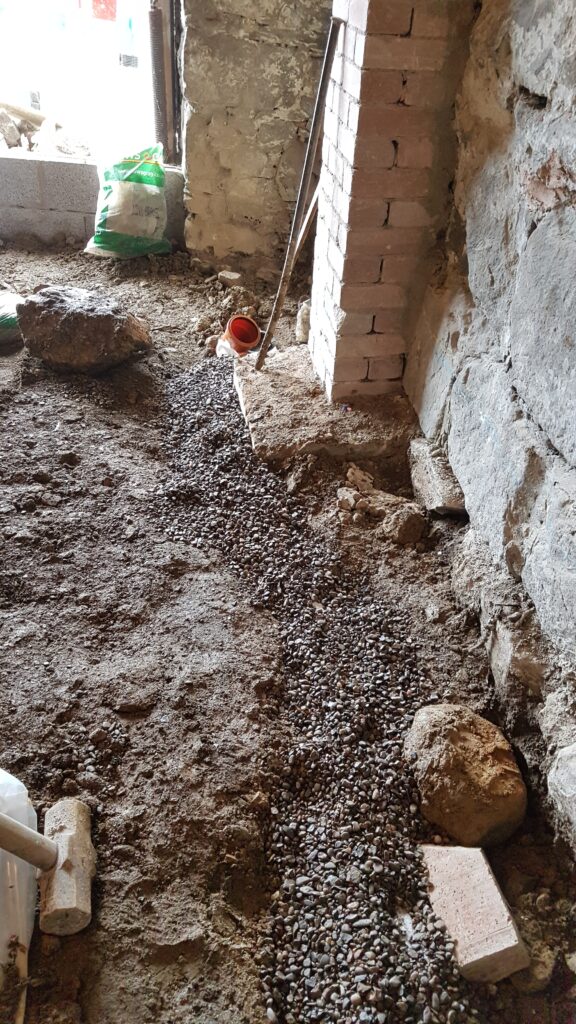
Side of garage towards front


