Skip to content

Tag: damp

The Saga of the Silty Soakaway: Volume 1

The main issue with this house is keeping it dry. Water seeps through our back walls from the high ground on the other side of them. This water needs collecting and sending safely away. So, before we install anything that will concentrate the water, we have to have somewhere to send it. Otherwise we’ll just end up with one very damp corner of our house!

The easiest place to make exits low enough in the floor structure would be through the new foundation for the new wall in place of the garage door. We had booked the concrete pour for the foundation for 3 days time, so needed to put pipes through the trench in place before this – setting us up for a very enjoyable bank holiday weekend.

Three Day Weekend GIF

The bulk of the water comes through the back wall in one place, and is collected in an existing drain at the back of the garage. The previous owners told us there was a pipe taking this water under the garage floor and out the front of the garage, which we confirmed during the foundation digging. This had apparently been carrying away the water for years; we had seen it flowing throughout the buying process (10 months, including over winter) and so believed it to be fairly reliable. Presumably this pipe went on to join some public infrastructure, taking water away from the property. Our plan is to connect all of our new drainage to this outflow.

We will be adding channels at the edges of the new floor slab to collect the rest of the water coming through the walls (that doesn’t end up in the garage drain). We need to ensure there is always a way for the water from these channels to drain, or our whole damp-proofing plan falls apart! We decided we would keep the existing pipe connecting the garage drain to the public infrastructure at the front, but unfortunately, we were about to pour a concrete foundation in the way. We also decided that the only sensible (and maintainable) way to route the water from the slab channels was through two new pipes through the foundation; this would result in everything being rod-able should anything block. Three pipes to go through the foundation, join together outside in an inspection chamber, then join to the existing exit point – easy.

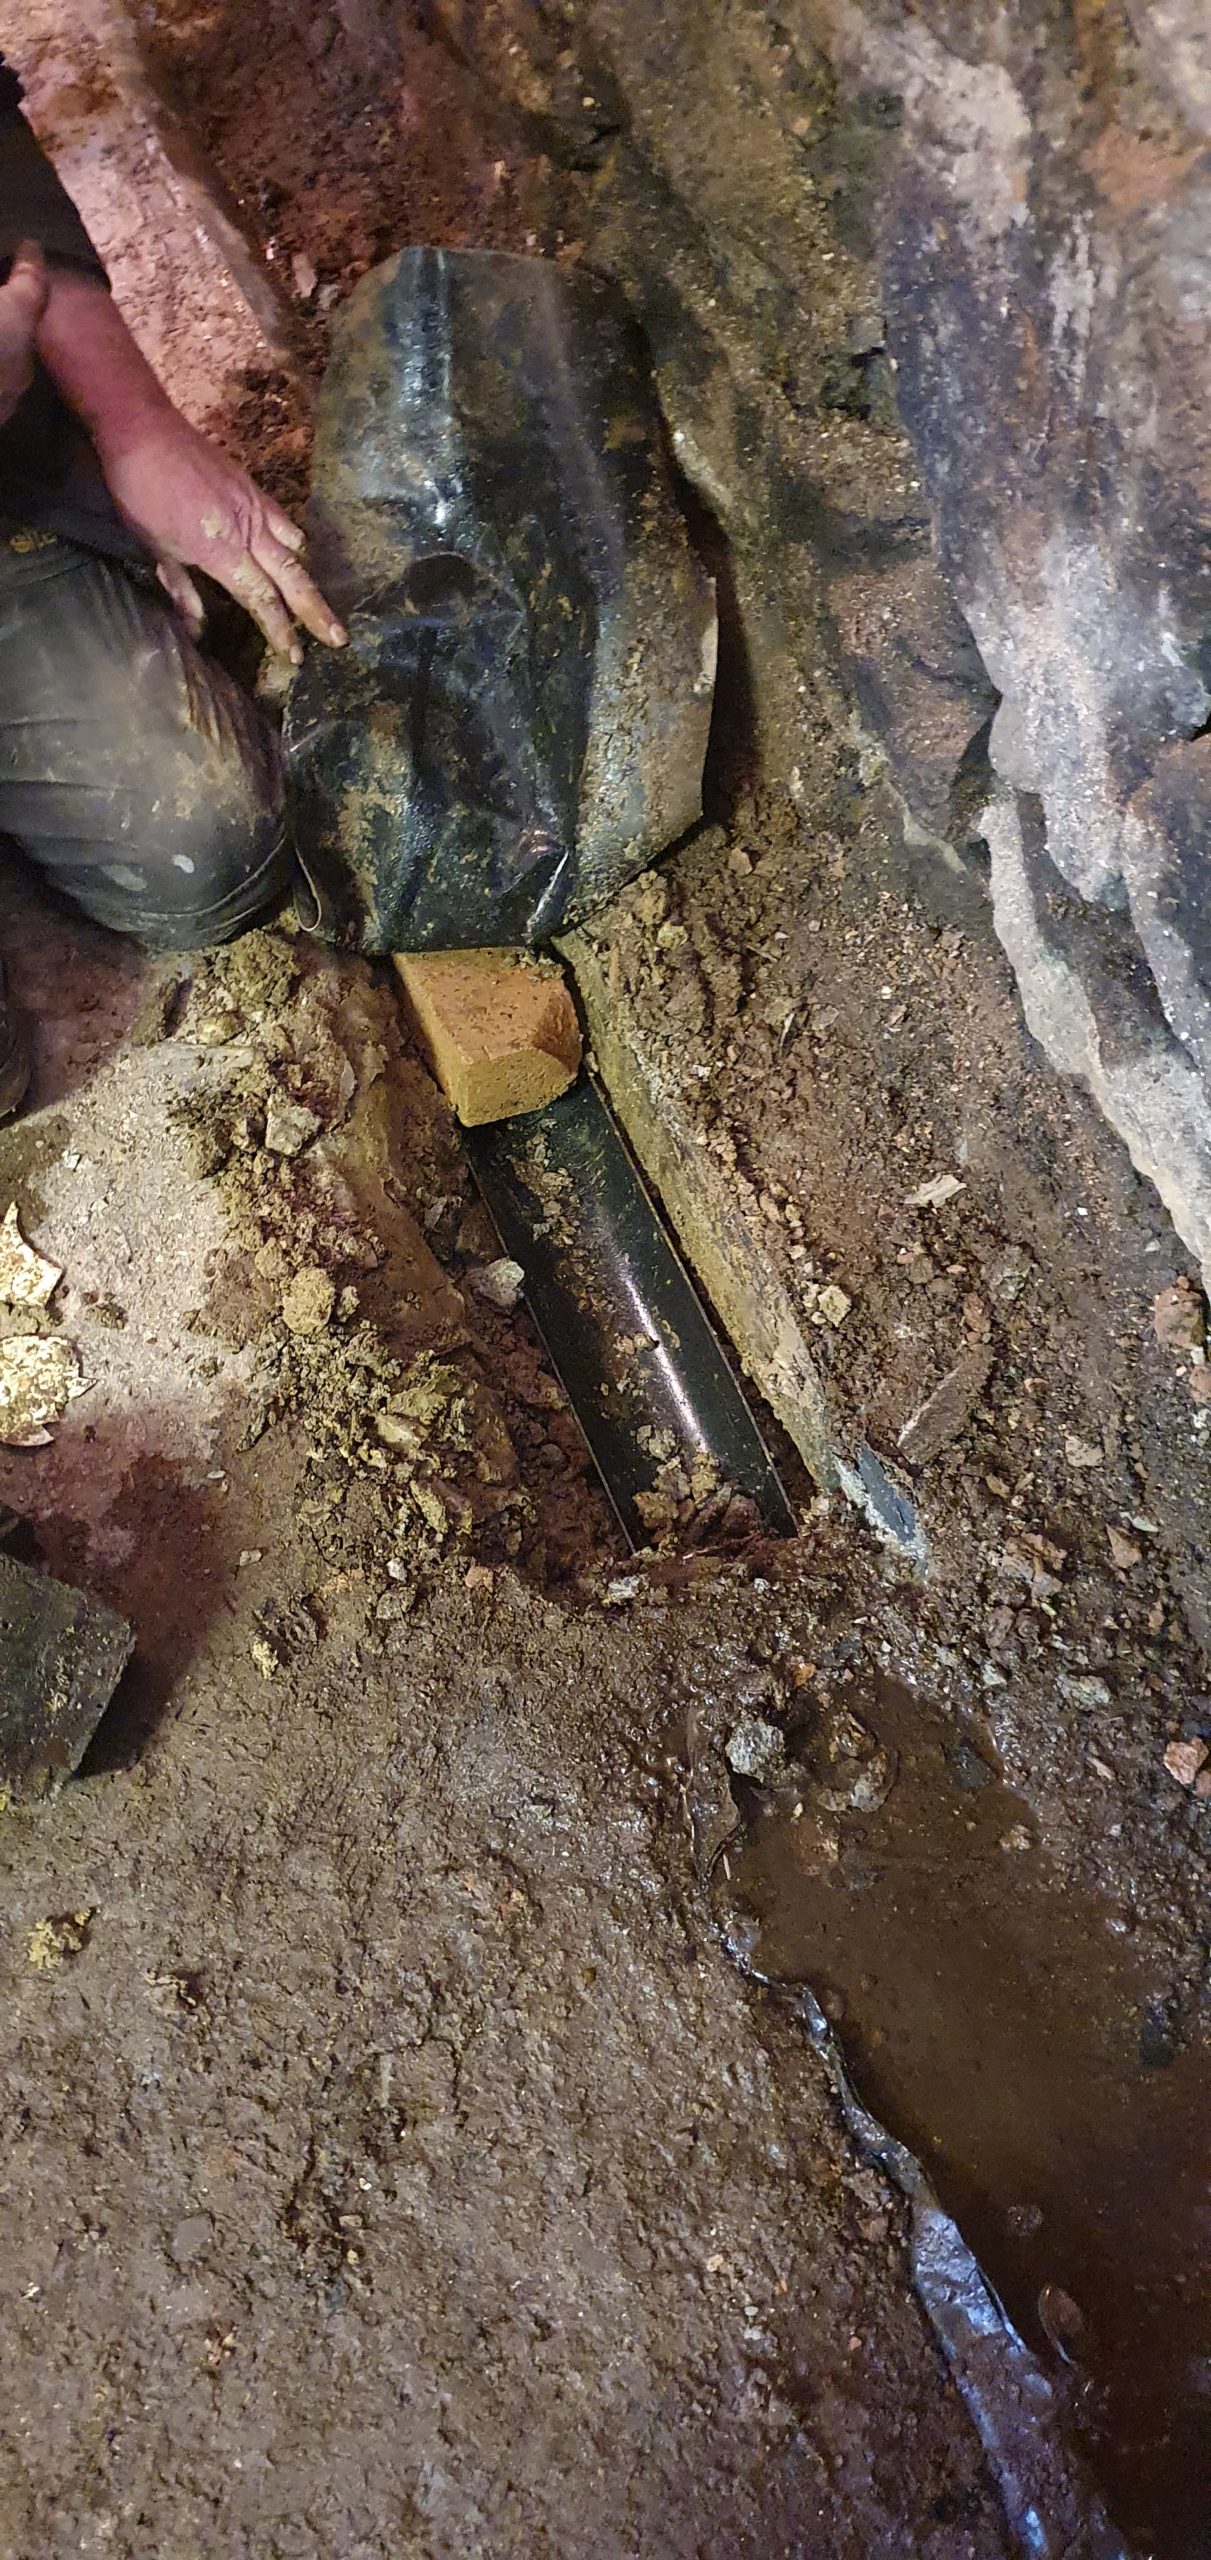
Having a plan, we bought the pipes, connectors and inspection chamber, and began to install. On digging a hole in front of the garage for the inspection chamber, we discovered that the original exit pipe just… stopped. It didn’t seem to be connected to anything, but simply be depositing the water into some bricks and stone underground; technically a “soakaway”, but that would be a very generous term. It was as we were having this realisation that we noticed something else; the water level in the “soakaway” was rising. As it turns out, digging a foundation trench next to a soakaway has a tendency to block said soakaway, as all the loose soil and silt is washed into it, filling all the little drainage holes emptying it.


The water level was already quite high, only a couple of inches below the bottom of the foundation trench. So we dug, hoping to discover some hidden, more capable water-drainage mechanism – surely this tiny soakaway hadn’t dealt with all the water for all these years! The water was cold, and the hole was full of stones and bricks and horrible silty gunk. We dug some more, hoping to clear some blockage and see the water disappear. The deeper we dug, the deeper the water got. The hole got closer and closer to the edge of our property, both in the direction of the road and our neighbour’s front patio; we had to stop before we collapsed either!

We tried poking the depths of the hole with various instruments – including the garage door locking bar. Multiple times our hopes were raised as the bar slid deep into the surrounding material – surely we’d found an exit point, and the hole would empty as soon as the pokey stick was no longer embedded – but no change. Whatever was down there was not taking the water away very quickly at all. It was maintaining a fairly consistent level below the of the foundation hole, so we tried to convince ourselves this was how it had always been. Maybe it had been at that level for years now. Then I decided to have a go at clearing some gunk… the level got higher, and higher and started to fill the foundation trench…

Whoops.

Awkward Season 4 GIF by The Office

By this time it was Monday evening, with the foundation being poured on Tuesday morning. We removed more and more gunk but eventually we admitted defeat, hoped for the best overnight and planned to rent a pump the next day.

In the morning, the water was even higher, threatening to come all the way into the house. Thankfully, the local plant hire had some ridiculously over-specced pumps, complete with fire-engine style hoses; we almost felt silly for all the panic when the one we rented emptied the entire trench in less than a few minutes.

men hoses GIF

With the pump standing guard, the foundation was poured. Thankfully, instead of trying to assign blame for the additional blocking, Ethan came up with the idea to order an industrial wet and dry vacuum. We thought it was a long shot, but maybe if we could get some of the silt out it would start draining and we could finally see what was going on, rather than scrabbling around in muddy water.

We looked crazy spending our evenings hoovering our front garden, right next to the road so every passer by could watch us. But when that water started flowing away – what a feeling. That hoover is the new love of my life – sorry Ethan. I was so happy, our house wasn’t doomed to flood.
After we had cleared up, Ethan’s dad happened to pass by, and I was still so excited I dragged him over to see it exclaiming “LOOK AT THE HOLE! LOOK AT THE HOLE!”.

So:

Peep Show Fate GIF

More realistically, this is likely not the last chapter in the saga of the silty soakaway.

Rub-a-dub-dub, we’ll live in a tub

When we bought the house, we already had clues that damp was a problem in the house. We found rotting floor at the foot of the stairs, flaking paint behind the Welsh dresser, and bubbling reveals around the kitchen window. The question was: how bad was it, and what could be done?

Now that we’ve owned the house for a month, we’ve seen the extent to which water permeates this house. Much of the water is coming in above ground level, and can be blamed on the fact that the pointing on the outside has been left to deteriorate, to the point that there are many holes where water can easily get into the walls. Worse, it’s particularly bad on the West and South-West facing walls, where the wind is usually coming from, and therefore also the rain. This is an obvious area for improvement, but keep us completely dry.

Upstairs bedroom wall with water on the inside
Plug socket in the west facing wall with droplets of water inside

Below ground, much more thought is needed. The sellers told us that the building had remained a smithy until some time in the 70s; until then, the building had a stream running through it for the purposes of quenching and cooling. This stream had been contained by putting a pipe under the floor to send the water out by the front door. However, when the council re-tarmaced the road, this pipe was blocked, and the problem returned.

They then dug down outside at the back of the property, lined the external walls with slate tiles, and put a drain and pipe outside to direct the water into the drain in the garage, with a pipe leading somewhere out the front of the garage.

So we thought, OK, this hasn’t worked fully. But we have options, as no measures have been taken inside the walls. We had ruled out digging down outside to let the walls breath: we don’t own all of the land that meets our walls; and an existing higher-level retaining wall not too far from our garden would mean any retaining wall that we built would need to be very strong indeed.

With outside measures out of the question, we plan to fully tank the inside of the downstairs walls. One possible method is to cover the interior walls in a waterproof slurry, preventing the water from entering the inside of the house – for a time. It would trap the water in the walls, and the water would build up with no way for the pressure to be relieved. This would end in at least one of three ways: the wall itself would end up damaged by the constant pressure and move; the slurry would eventually give in to this pressure and leak; or the water would force its way up, and around our walls, causing dampness in other areas of the house. Water always wins.

We had many conversations with those with more experience than us, knowing that we wanted a solution that would keep the house dry for many years. A method that may achieve this is to let water and gravity get their way – on our terms. The basis of the method is to attach a cavity membrane to the wall allowing the water to escape the wall and work its way down to a perforated pipe installed below the indoor floor level. This pipe would direct the water towards a suitable exit. With the house being on a hill, gravity will do the work and no pump should be needed. It will require careful planning, but avoids reliance on man-made barriers resisting hydrostatic pressure; it should be low-maintenance and last a very long time.

After getting a professional damp-proofing company to quote for the work, and discovering the cost would be an enormous percentage of our total budget, we decided that we would have to do the work ourselves.

This is where we finally had our first stroke of real luck! Within a couple of days, we found a local person selling a large quantity of various damp proofing materials, including cavity wall membrane. And best of all, they were selling it cheap! We discovered that the seller had run a damp proofing company, but was shutting his business down. He offered to come and take a look at the house, and ended up giving us very detailed instructions of how we should go about installing the membranes and drains. Lots of notes were taken.

Stripping the house back to bare stone walls and exploring the existing floor was the next step. While removing the brick walls and digging up floors, we found that something similar to our method had been employed and had since, evidently, failed; not very encouraging. However, the plastic sheeting we found was very minimally supported, and thus had crumpled under its own weight, so perhaps the cavity membrane would improve the situation.

Crumpled plastic sheeting behind brick wall

We also found a small section of pipe leading out of the kitchen wall, some guttering (covered by bricks – what else?) and a thin strip of damp proof membrane placed on top, leading to the drain in the garage. We found that there was no drainage at all where the bottom of the stairs had sat. Pools of water form in this area – not surprising that the bottom of the stairs was completely rotten. After it has rained for a couple of days in a row, water flowing out of the wall is visible in this location, even forming little whirlpools as it flows.

Brick on a gutter

The concrete floor was also substandard. The thickness varies quite substantially across the room – in some places only couple of centimetres thick – not ideal. In others, you can see the damp proof membrane peeking up through the concrete, meaning it could have very easily been damaged. Where the stairs had sat, there is no sign of damp proof membrane or concrete. If there ever has been anything, it has disintegrated and all that is left is essentially mud.

As it rains more and more we are carefully watching the walls for problem areas. It’s reassuring that where most of the damp problems were originally visible, the previous owners had done the worst job applying the technique we plan to use. It explains the extent of the problem, and gives us a clear area to make improvements. So, provided we manage to install a drain around all the underground parts of the wall, properly membrane both the wall and floors, and don’t provide any plaster bridges around these membranes – we SHOULD end up with a nice stream-free home. Not too much to ask?

In summary, we’re building a house-sized plastic boat inside our house, and putting a drain around it.