Skip to content

Tag: brick

Health and Schmafety

How to move big chunks of granite with inadequate knowledge and equipment

Now that we’ve blocked up the only way into the bathroom and master bedroom, we’ve got to open up a new one. In order to achieve this we have to dismantle a door width section of the half-meter thick, random stone-rubble-stone wall, and install concrete lintels to provide lateral strength to the remaining wall and roof supports.

We had started with the top of the stone wall in the loft, before we had filled in the archway. Ethan spent a few hours laying down in the loft crawlspace, chipping away at mortar and collecting rocks and rubble to pass down the loft hatch to me. Larger rocks were slid down a makeshift scaffold board ramp, from the loft hatch. Once the archway was blocked up however, we decided to take down some ceiling boards, remove the bedroom door and work from below.

Just a few issues with removing the stone: being mostly granite, even small-ish stones are heavy; the stones are irregularly shaped meaning the stability of the wall is difficult to predict; much of the wall is above head height, which is not so fun when dealing with heavy rocks; oh, and there’s a massive hole in our first floor with no railings – so stumbling isn’t an option.

Hans Gruber Falling GIF | Alan Rickman | Know Your Meme

Here are some pictures after ceiling and door removal, with a little of the stone already removed:

Bedroom door removed
Door and ceiling removed

Stone removal quickly slowed to a crawl when we discovered that the builders 200 years ago clearly just wanted to show off; the rocks, 6m above ground level, just seemed to get bigger and bigger. With the rocks being so irregularly shaped and so heavy, and me having little to no upper body strength, we had to call Ethan’s dad in to help Ethan manoeuvre the rocks, and come up with a more inventive way to lower them to the ground floor.

Stones at the top of the wall, all to be moved. Hand for scale.

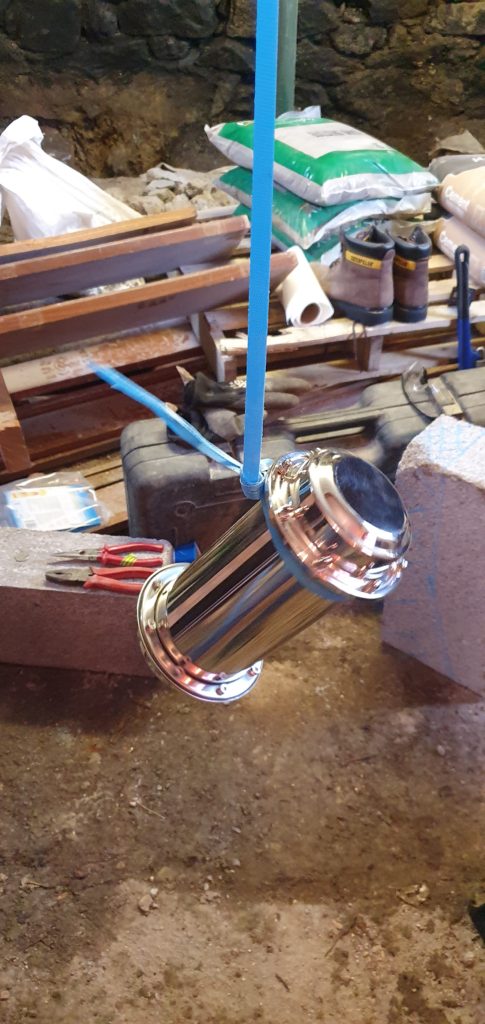
Luckily Ethan had been saving a bag of climbing equipment that hadn’t been used in 15 years – save for hoisting electrical pylons in rural Uganda. Perhaps I should question the hoarding tendencies less? Ethan and his dad carefully moved and lowered the rock into a position on the edge of the wall, sometimes slowly “walking” the rock downwards by carefully placing and removing bricks. We used climbing slings and carabiners to attach the stone to a rope, hung this over a ceiling joist, and then used a belay block to control the lowering of the stone, first onto the first floor and then onto the ground floor.

Strapped up rock, ready for lowering
Ethan and his dad setting up the belay station

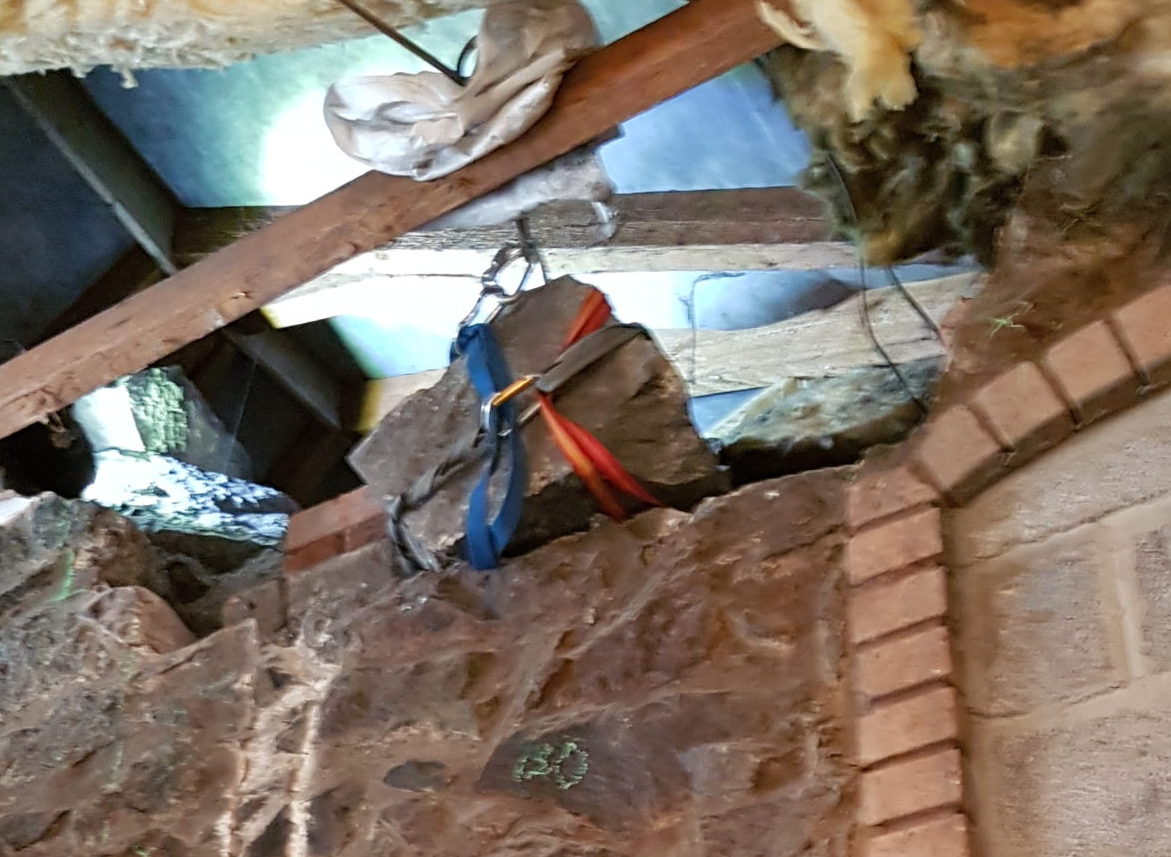
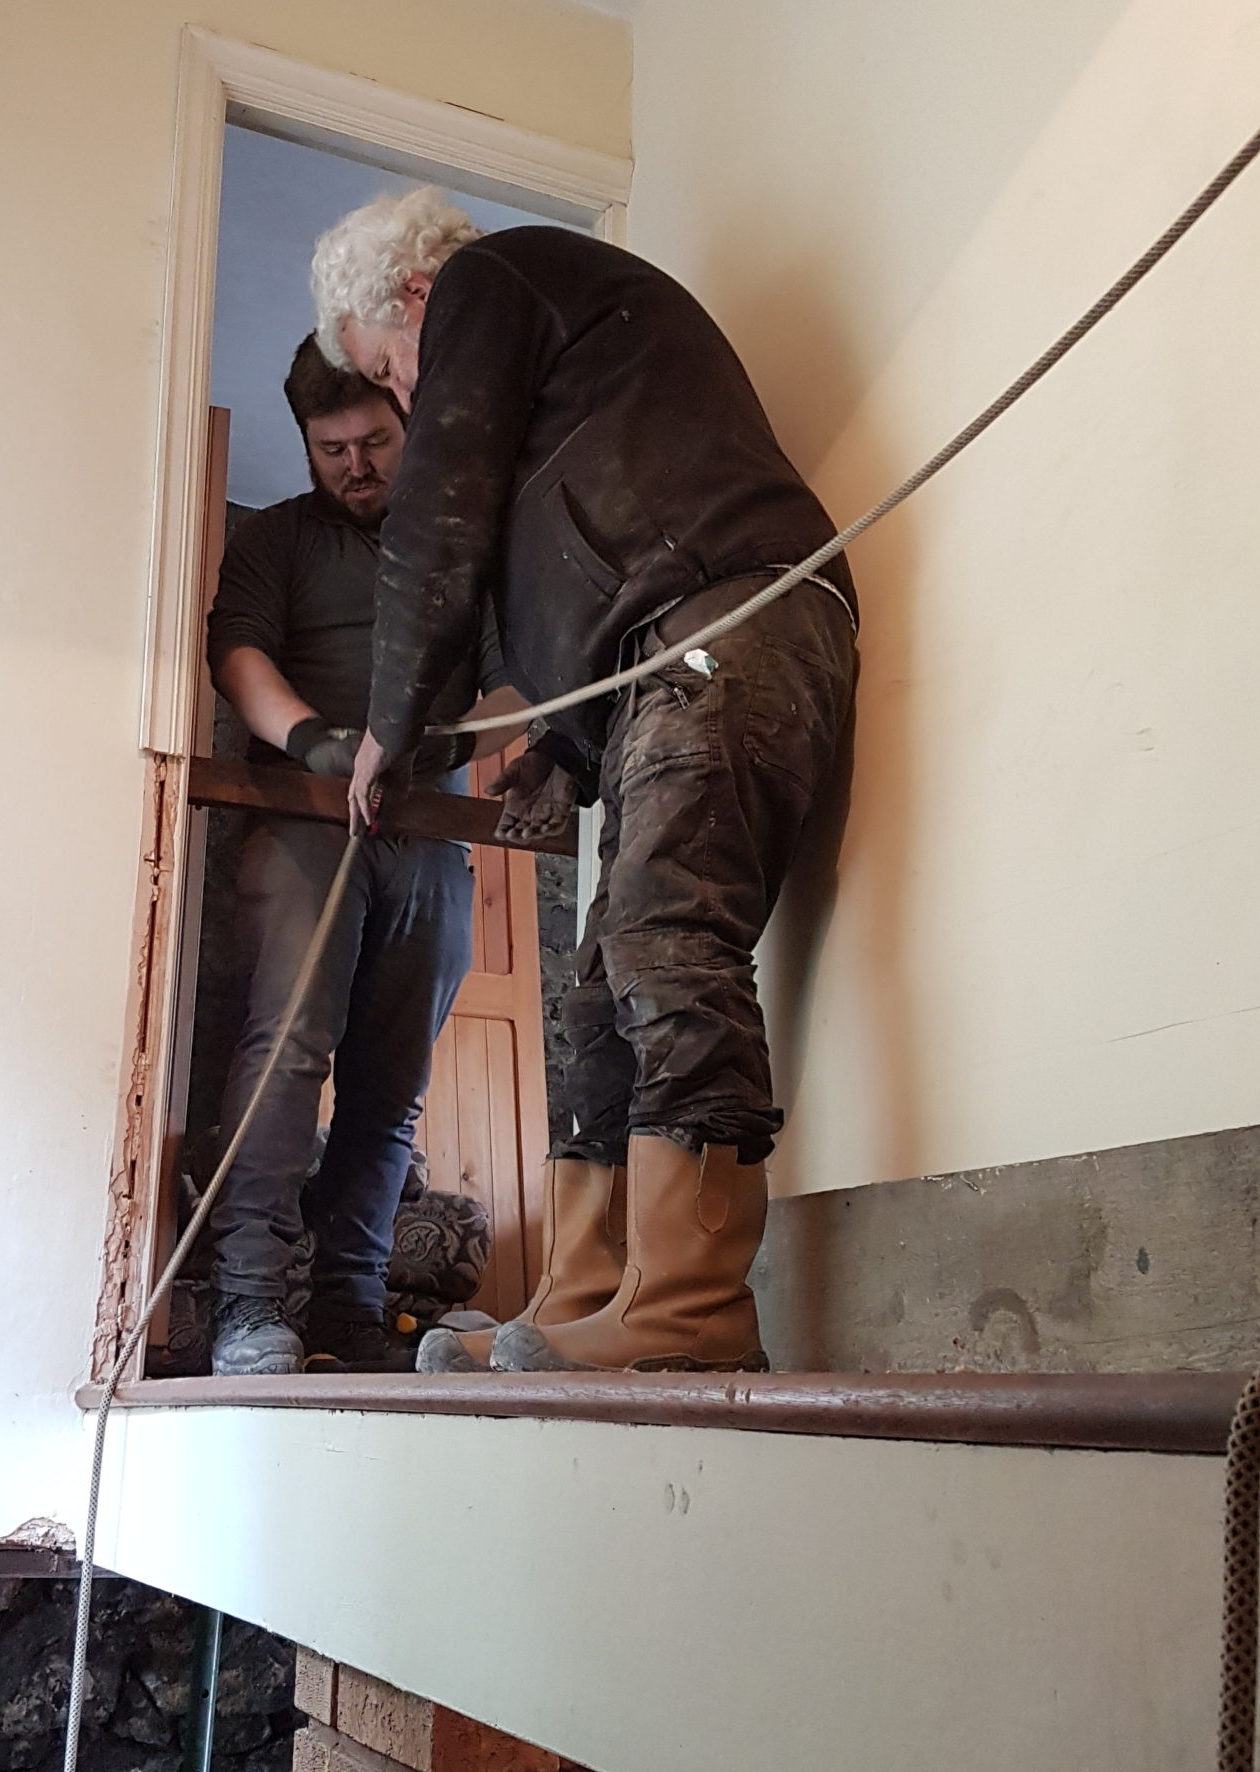
We were successful in lowering the stone to the ground floor – albeit if the last meter was close to freefall, as the stone started to escape its straps.
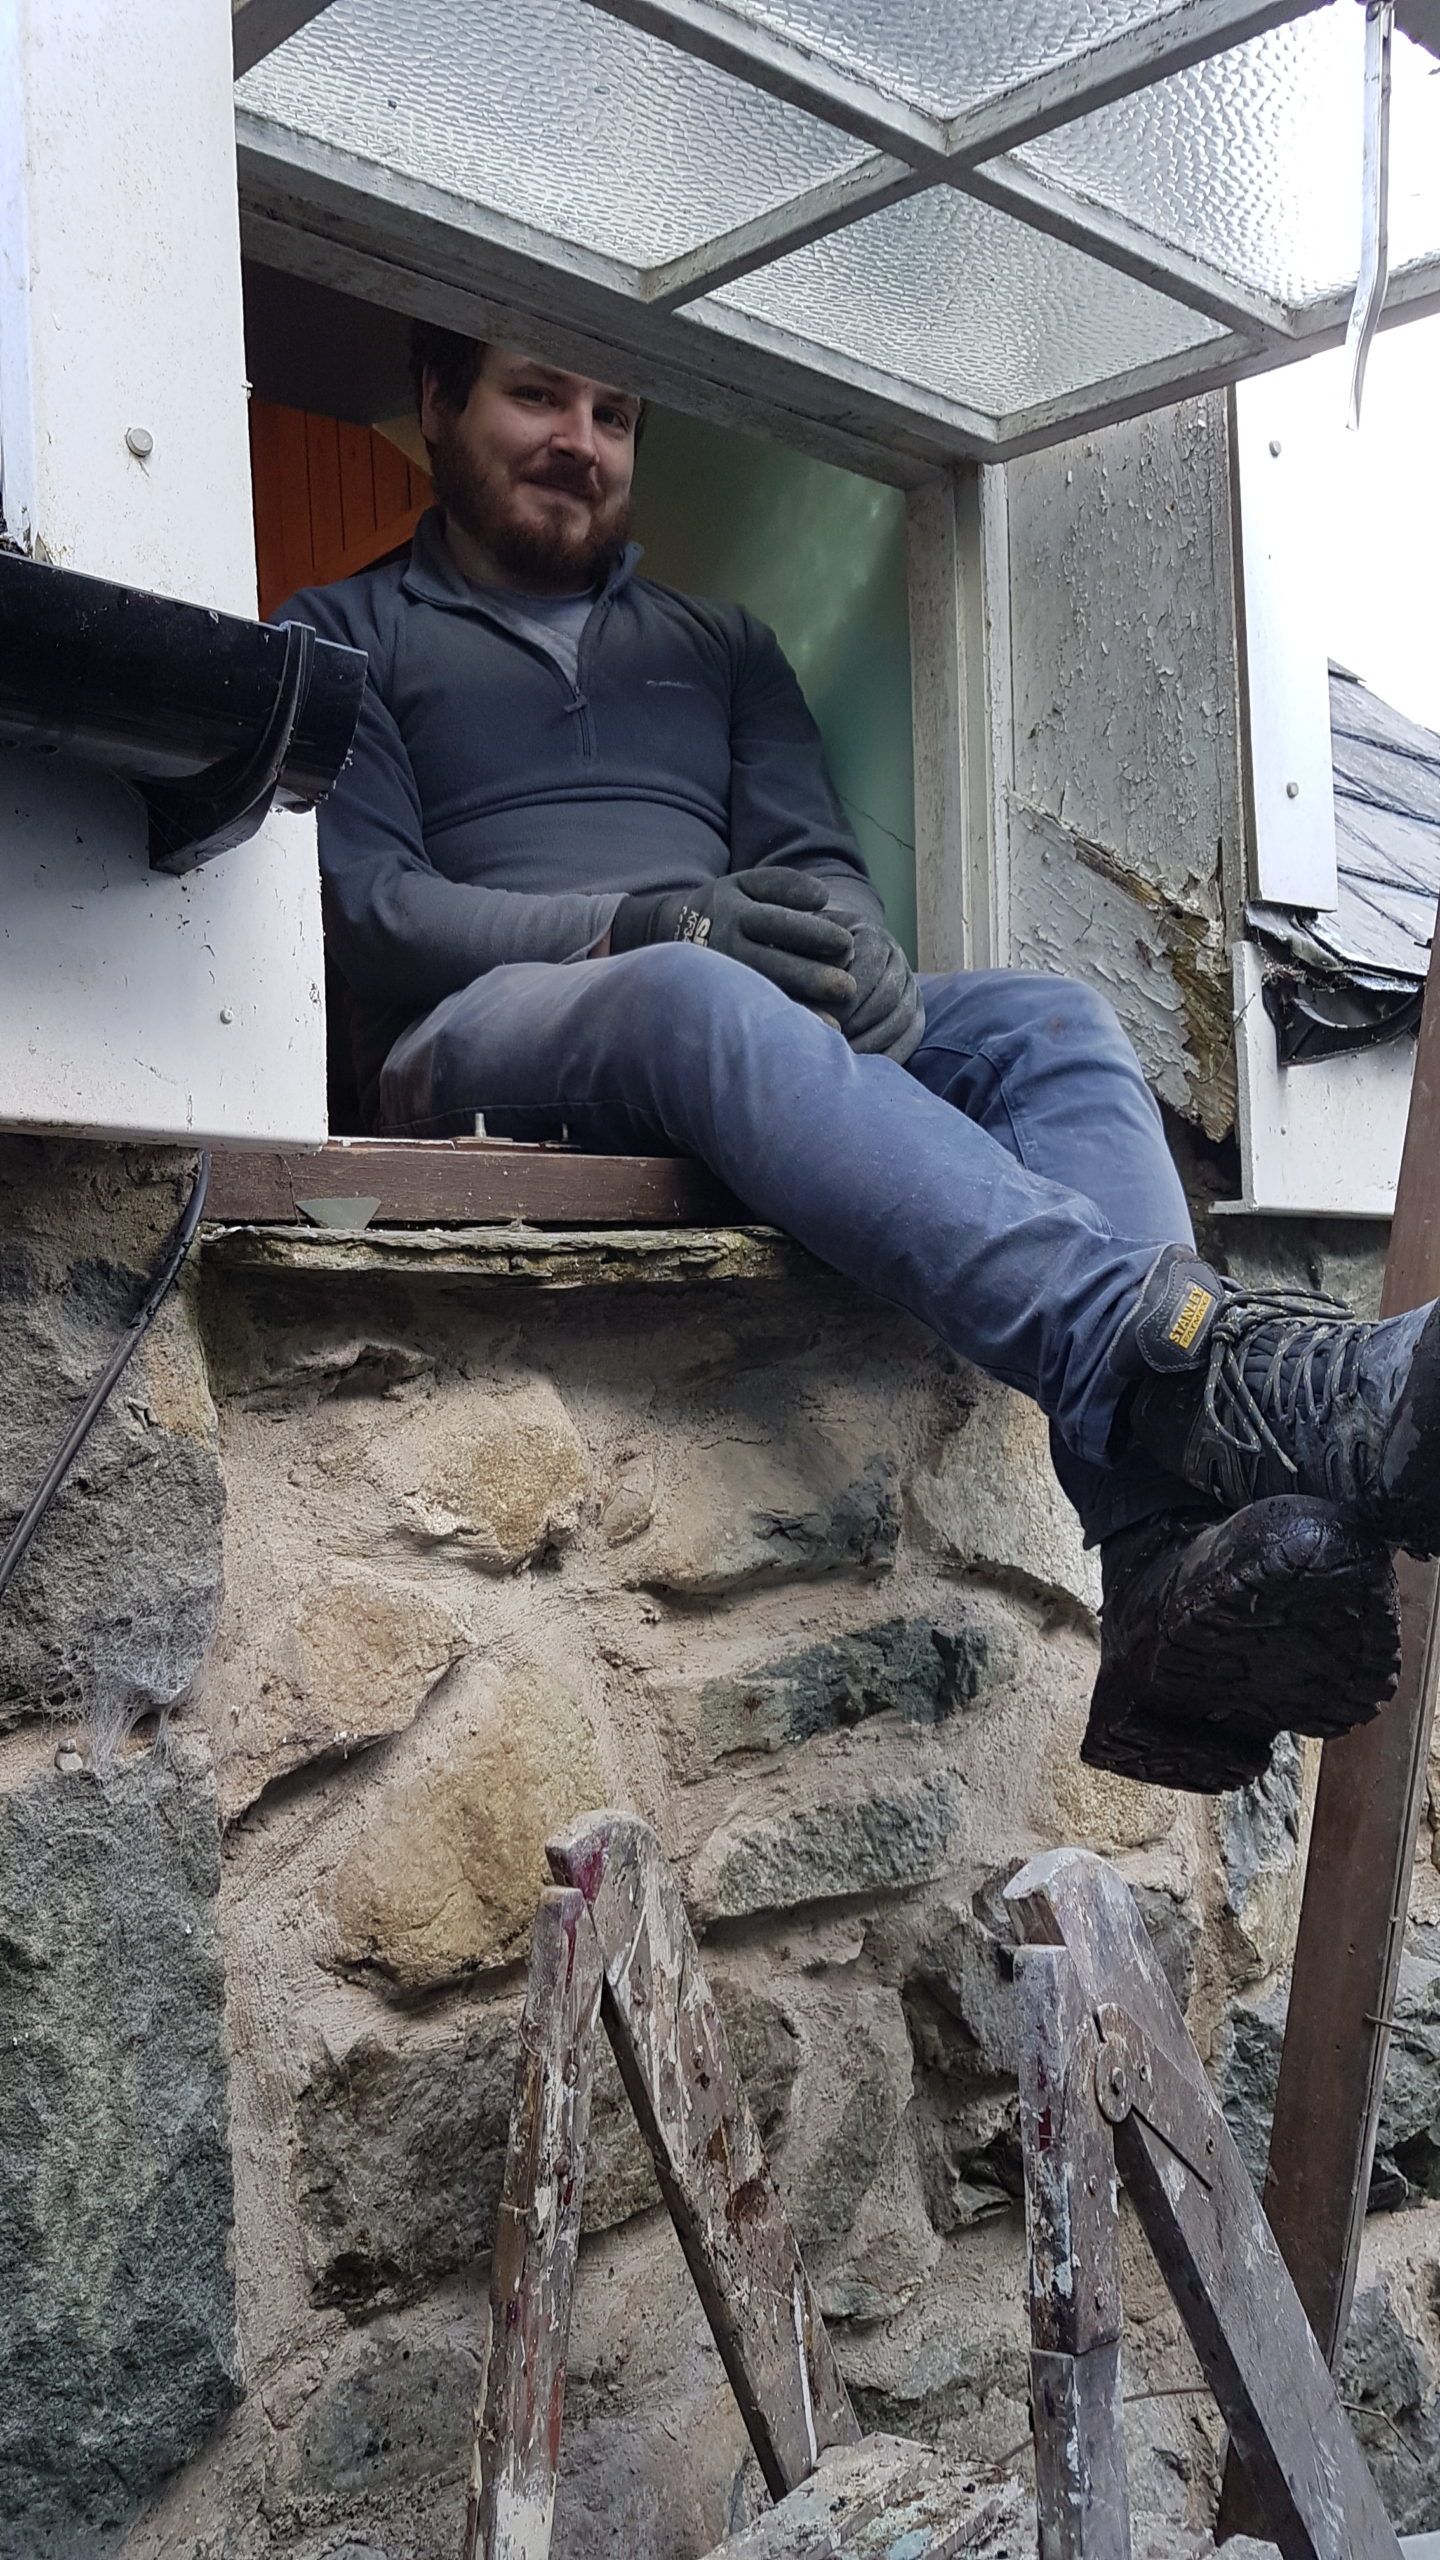
I would have liked to have taken more photos of the process and to have captured some of the more hairy moments, but although I wasn’t in the centre of the action, I felt it best to keep my hands free whenever things were looking hairy, should a ladder need steadying, or a piece of equipment need quickly providing or offloading. Ethan shown here at the lower end of the peril spectrum – having things completely under control. No danger here.

The HSE-approved one-handed rock steady, combined with plasterboard leg brace for extra safety. Note the complete lack of PPE – for maximum agility. Now that we have the technique down, we managed to get a few more of the larger rocks down off the wall:

And then onto the floor, having decided that freefall was the best – and most fun – method:

Here is Ethan standing proudly on his newly built henge.

Can you spot the slightly twisted ladder leg? Definitely nothing to do with throwing giant rocks from the 1st floor. And I definitely didn’t tell them so – I’m the best backseat demolisher, not in the least annoying.

We’re hoping from here on out (at least on this skin of the wall) we are done with the giant rocks. We know that the other skin has larger rocks, but we’re hoping they won’t jut out far enough to mean we have to remove them too. Not sure where this hope came from, or how realistic it is!

Oh and guess what? We found more brick!

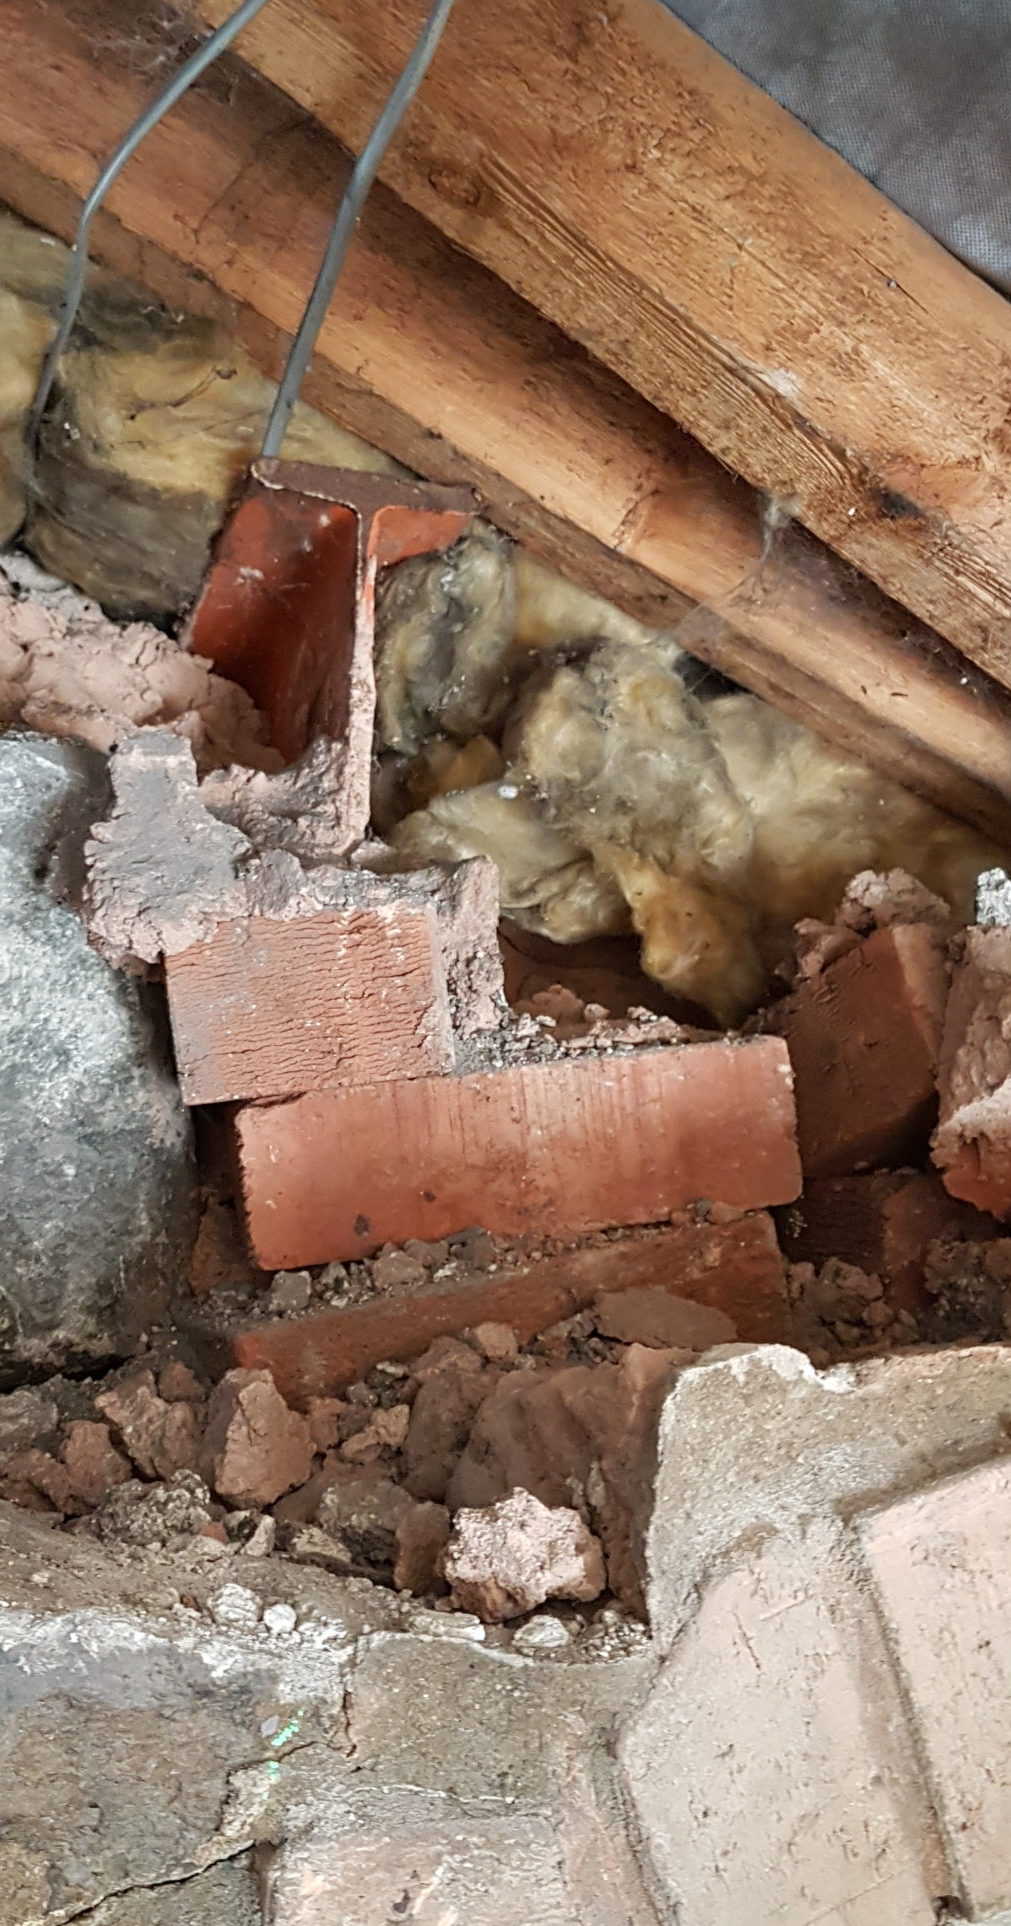
These somewhat wonky bricks are what supports the RSJ that holds up our roof. We weren’t really planning on replacing what was under the RSJ – but I think we’re going to have to. Time to rent more acrow props!

hooray gif - Living Letter Home

Walling Off Our Problems

So far, our “renovation” blog has been entirely house clearance, demolition and whining about damp. No longer! We built a thing.

To have enough space for stairs and a landing in front of our new back door, we need to turn the stairs around. This means we need to remove a small piece of landing, to provide headroom. The trouble is, this small piece of landing currently provides the only access through the previously-pictured brick archway to the bathroom and master bedroom. So we will need to reposition the opening currently provided by the archway. We were hoping to simply remove the brick archway and the stone above, and open up the wall next to it. Unfortunately, the house thwarted our plans again; on exploring the loft we found an RSJ, acting as a roof purlin, resting on the arch. Under advisement from a structural engineer, we have now built a wall to fill the archway with concrete blocks. I say ‘we’; I know nothing of wall building, and struggle to carry small things up the ladder, let alone 20 kg concrete blocks. So while I tried my best to help where I could, Ethan’s dad built the wall, and Ethan transported and cut the blocks. I did use a mixer for the first time, and make my first ever mortar (I can’t yet be trusted with adding the water though)!

Helping GIF - Helping ImHelping IAmHelping GIFs

First we had to pour a concrete cap on the stone wall under the archway, for the new concrete wall to sit on – stone walls are too irregular to just start building on top of. Of course, this archway, being the only current gap in the stone wall between the two halves of the house, is where some electrics and pipes cross between the halves. More concerningly, the water main enters the house through the outside leg of the archway. So within this concrete cap we created two channels: one using a piece of rigid pipe to contain the wires, and another using a 22mm flexible pipe to contain the 15mm water main pipe. We had to cut back joists that support the small piece of landing we eventually want to remove, so more acrow props were employed. Cutting these joists back revealed that half the brick archway was just hanging in the air; a good proportion of the first layer of bricks were resting on nothing. Not entirely sure how they achieved this, but it was was reassuring that we would be pouring concrete underneath to give it something to rest on.

harry potter magic GIF

We built some shuttering to stop the wet concrete falling off the wall, using pieces of wood from the removed stairs. Next, we hoovered off the worst of the dust, loose stones and broken glass (why wouldn’t there be broken glass under the floor here?). The wall was ready for concrete. We found a suitable ‘tray’ in the shed for concrete mixing and Ethan got to work.

Yes, he knows there’s no water in it yet

After waiting a week for the concrete to dry, wall building could begin. We did half one week, so that we could leave the mortar to set and still be able to climb through to the other side of the wall. And the second week, we blocked ourselves off from the bedroom and bathroom. Eventually we’ll open up a new doorway – but in the meantime, and for wall building we made use of the bathroom window as a convenient and easy entrance/exit.

Charlie waiting out a hail storm:

A video of Ethan looking deceptively competent with an angle grinder:

And here, for your viewing pleasure, some wall pictures:

As we were going to have a cavity wall, which will *hopefully* be standing for a long time, we also decided it was a good opportunity for a time capsule. We included this blog so far, a bit of background on us/letter to the future, and some.. coins… we kind of ran out of ideas!

Pictured with our bespoke pallet-wrap lowering mechanism – because we only thought of this when the wall was already mostly done. It’s designed to be buried and survive for 200 years, so hopefully it will last even longer in a nice dry concrete wall (provided we manage to make this house dry).

Having walled off half of the house, it is a little tempting to just… leave it. Definitely shortens the project!

Happy Well Done GIF