I have probably laboured this point enough purely with examples but it’s worth saying again: With a house like this, it’s never a simple as just replacing something. Windows and doors were scheduled to be installed in a couple of weeks. We had already begun to install window and door sills in many of the openings, and managed to get our dilapidated garage door replaced with a beautiful wall. This was progress, but we were not ready.
To complete the preparations for the installation we had to ensure that all openings were sturdy rectangles of the correct size, including slate sills below and something above suitable for fixing doors/windows to. We already knew that both the front door and the dining room window currently each had bowed rotting pieces of wood for lintels, that would need replacing. Other openings still needed exploring.
As seen in a previous blog (Waiting on windows), most of our window sill installations went relatively smoothly. We kept the old windows in place as best we could, with only a few requiring a little surgery on the frames to make enough space for the sill. We now had two window sills left to install: the garage/lounge and the master bedroom. Both windows were much wider than the others and thus required much longer sills, which we’ll talk about later. But the master bedroom had additional issues…

The stone in the wall below touched the bottom of the window frame, leaving no space for a new slate sill. We needed to create this space. The frame, however, was in considerably worse condition than the other windows had been. In places, the wooden frame was so rotted that it threatened to fall away if touched – in a few places it had already, leaving the corners of glass panes exposed.
We spent a little while trying to reinforce the window frame by attaching extra, newer lengths of wood hoping these would keep it intact while we undermined it. This only caused more cracks in the glass, foreshadowing Ethan (who was precariously balanced on the ladder) being showered with splintered glass if we continued. So we decided to tape up the new cracks and remove the window in its entirety; we’d have to live with yet another boarded up window for a couple of weeks.
Neither of the large openers were able to open wide enough to detach at the hinges, as they collided with the slate cladding – another impressive design flaw from the previous owners. Most people only ever want to open windows by about an inch right? Our solution was to cut the window into its 4 sections and remove them one by one. It went shockingly well and, as far as we know, we did not shoot any shards of glass onto our floor or into the street.

Removing the old sill 
Top openers ripped out 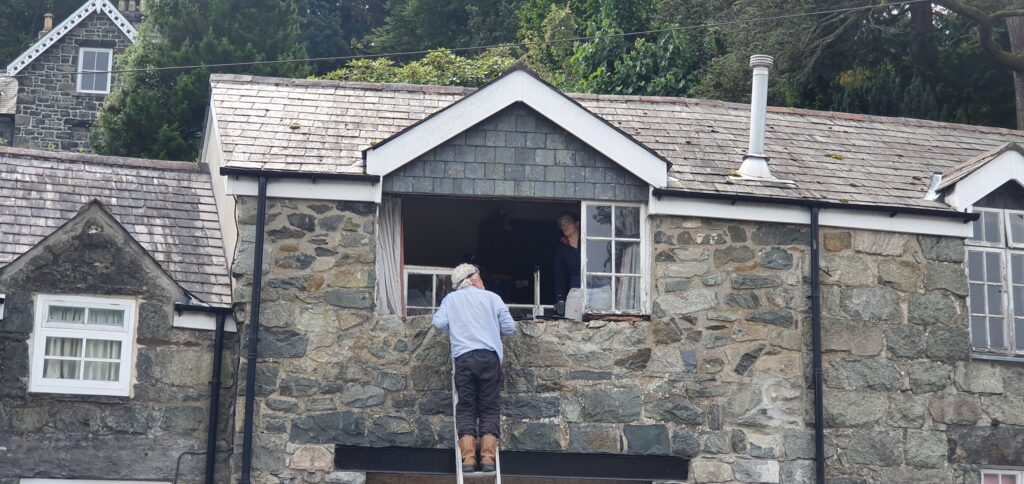
Last section to go
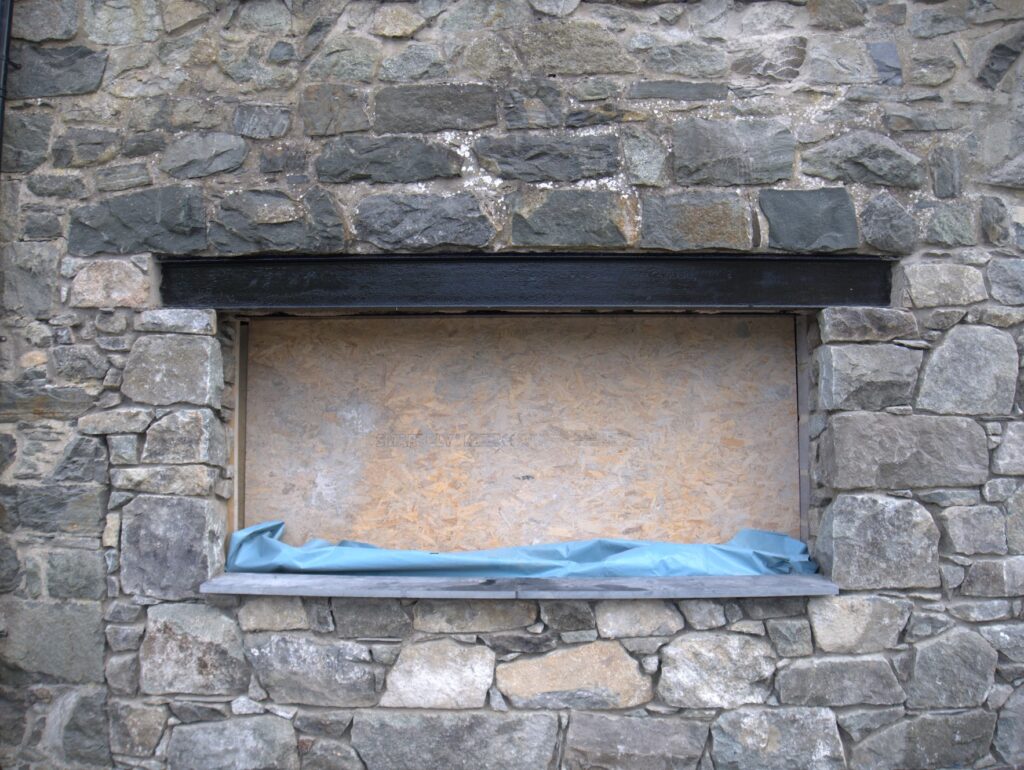
Having taken the window away we discovered that the wood above to which it was attached was also rotten and no longer straight (if it ever was). This was a fairly simple switch, apart from needing to cut back various pieces of wood and nails in a very small space while trying to avoid cutting or disturbing the fascia board that had tiles hanging from it. We mostly succeeded.

Back to the problem of the long sills. Both the lounge and the master bedroom sills needed to be longer than could be bought in standard lengths of slate. This meant that we had a choice between spending a fortune on a long piece of slate for each (and trying to lift one of these to the 1st floor), or simply doing each of the sills in two parts and mortaring between. We chose the latter.
When the slate arrived we found that it was not as uniformly coloured as our first batch. While the main colour was the same, a couple of pieces had additional layers of a darker colour. We had no time to wait for a replacement, so these would have to work. We decided to use the most non-uniform sill for the master bedroom, that way it would only ever be seen from inside. We still took our time deciding how we wanted the two parts to fit together and where exactly we needed to cut to minimise the obvious break in the middle. As I said – we had no time to wait for replacement slate, so we had to get it right first time.
To create a good finish we had to align the two pieces of slate perfectly on installation, both along the wall (so that the slate patterns matched up) as well as in height. A tricky task, that we handed off to Ethan’s dad – with our ever-frustrating supervision. Without a straight tool long enough to hold against the front edge of both the slates to check that they were parallel with the line of the wall, a ladder was used in its place. I WISH I had taken pictures of the three of us holding an old battered ladder horizontally across the front of our house, crouching down a little to peer along its length – passers-by were sure to think we knew exactly what we were doing.
Fortunately, this method was only feasible on the ground floor window, so we were spared the embarrassment of doing it twice, and opted to check the 1st floor sills with a shorter level and by eye.
Both these long sills needed mortar between to join them. We wanted the colour of the mortar to match as closely to the final colour of the slate as possible so that the eye would not be drawn to the join. The slate would eventually be sealed, so we sealed a small sample for comparison. Here are the very scientifically prepared colour samples:

And the resulting window sills:
Garage/Lounge window sill 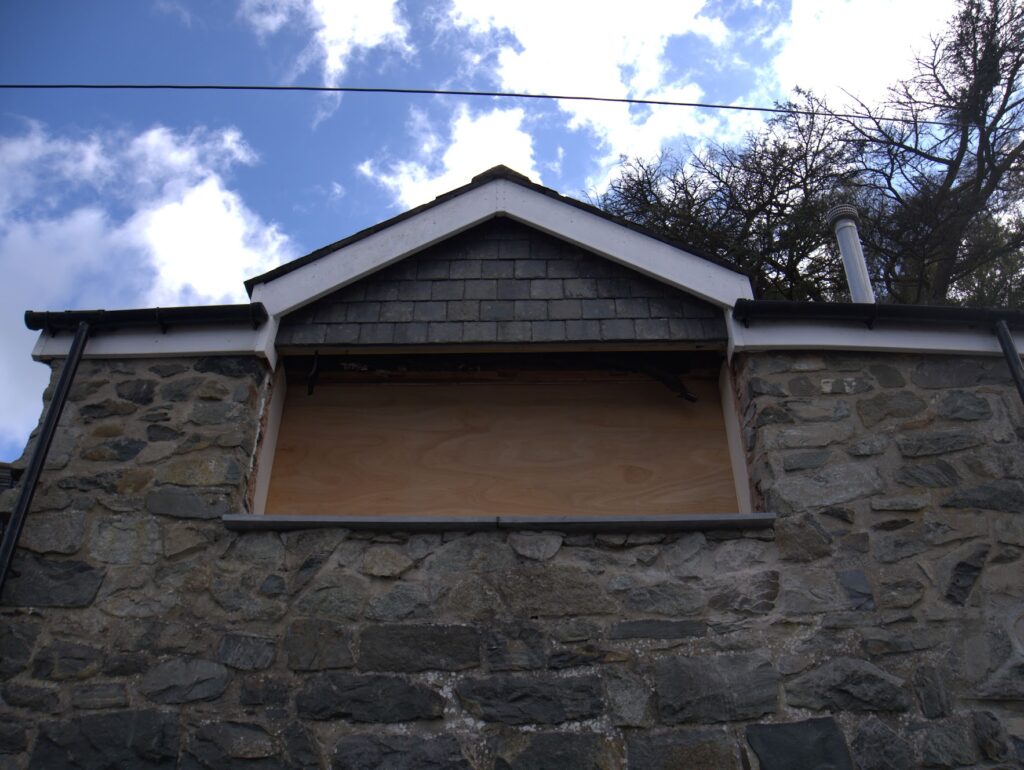
Master bedroom window sill 
Master bedroom window sill, with pattern matching
Hopefully the mortar will match the slate, once it’s sealed and a bit darker.
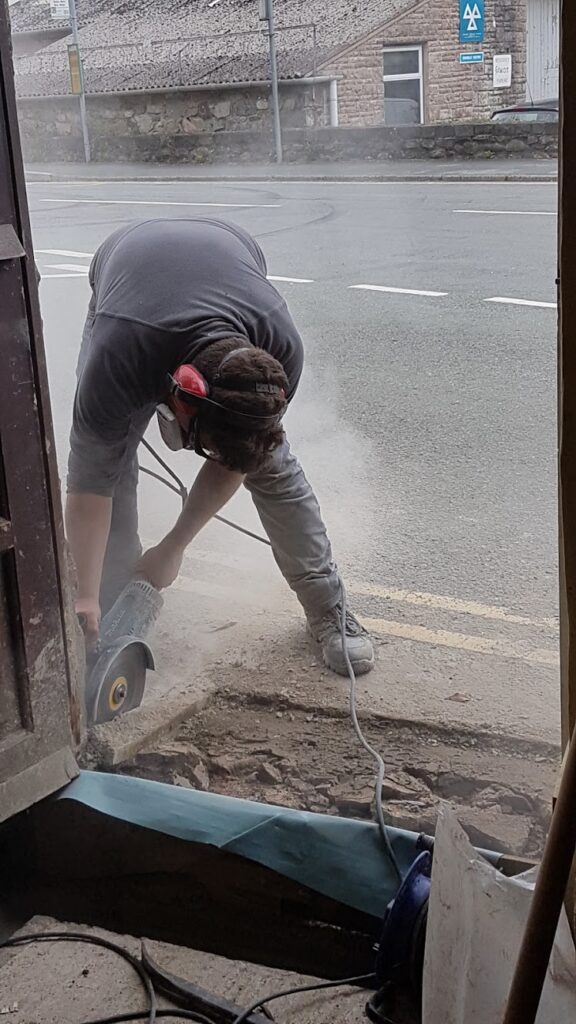
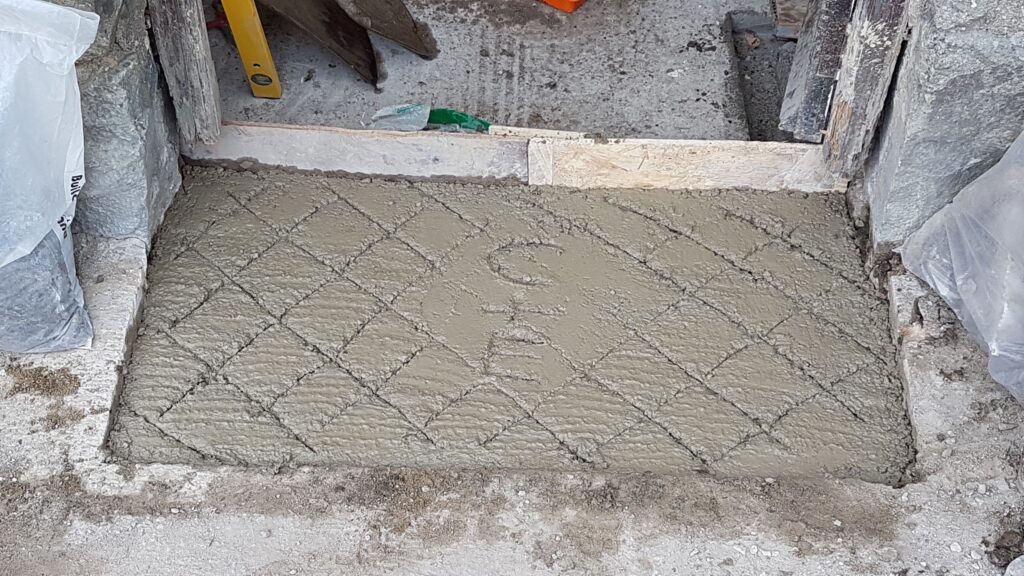
The final piece of slate needed was to replace the broken and undersized front door step. First, we needed to create a sturdy base: Underneath the existing doorstep there were rocks and mud. We cut back the area using a grinder, dug and hoovered a little, created a former at the back of the existing door and poured some concrete. Ethan’s dad finished it with a nice decorative touch that will hopefully never need to be seen again (although I was a fan).
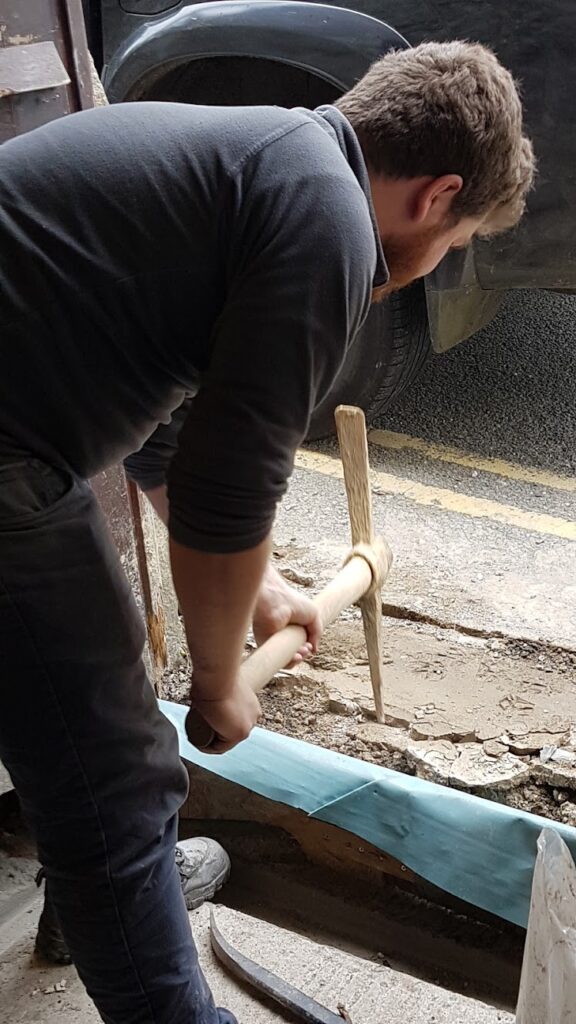
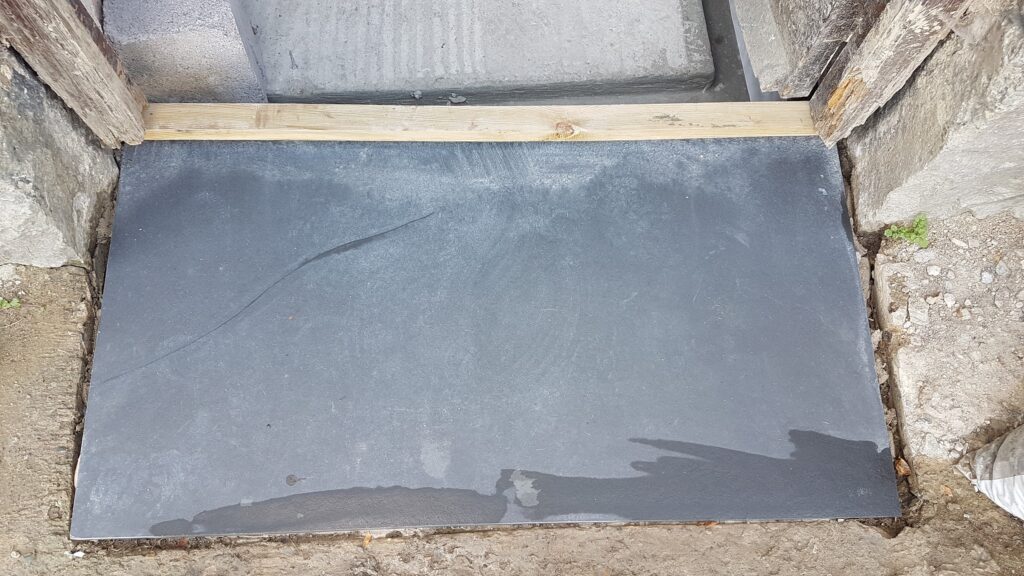
We let the concrete set and then lay the new doorstep with a fall to redirect water away from the door, and at the right height in the doorway to fit our ordered door (Apparently the shortest and widest that they could possibly manufacture). A few days later we noticed that, although the water had drained from the step, and none had entered the house despite the heavy showers and hole under the door, there was still a thin wet line left across the step – a crack.
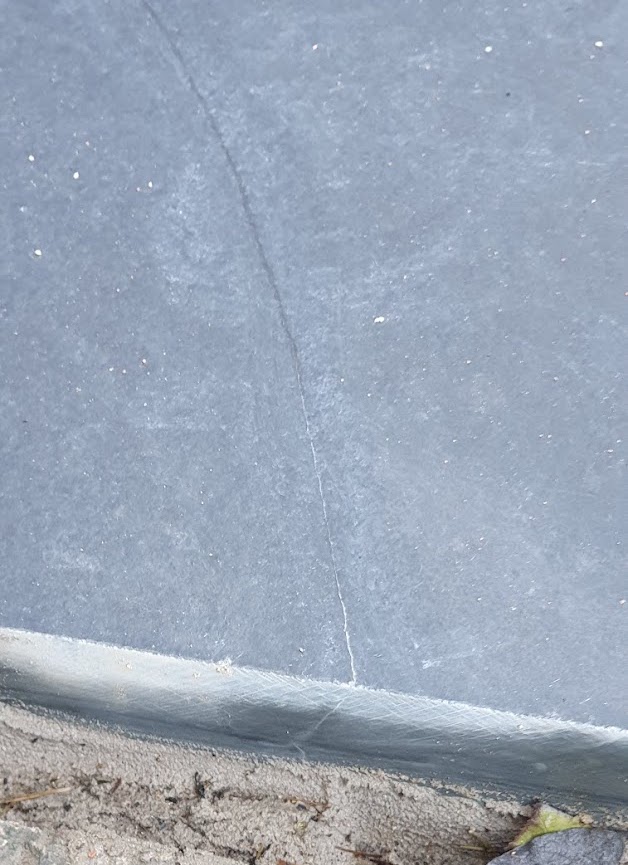
It might never develop, it might just stay that way forever – but with a new expensive door being fitted on top of it, it was not a risk we were willing to take. It was quite likely that come winter, water would freeze and expand in the crack, making it worse. New slate ordered, and the old slate was lifted. On the plus side, we got to see the nice detailing of the concrete again! It was probably for the best; With the lintel above needing replacing, who knows how much rubble would fall and how much of a battering our nice new doorstep would have had to take?
We started on the lintels while we waited for the new slate to arrive. The rotten wooden lintels of the front door and the dining room were the first to go. The dining room lintel was accessible from the inside, possibly without affecting the old window. However, the front door frame was certainly in the way of removing the old lintel, so this had to be cut back to gain access.
At this point, Ethan’s dad had clearly decided he’d had enough of my sarcastic remarks about his methods and launched a chunk of wood straight at my eye at high velocity using a reciprocating saw. I managed to get my eye shut before it reached me, but it certainly shut me up for a while. Luckily we had an unopened cold can of something, so I managed to avoid getting a black eye. Although, this meant I was unable drag out the guilt tripping much. I will remember to put goggles on next time though.

After the frame was cut back, we would be able to remove the old lintel. Ethan and I were not feeling good about simply removing the existing lintels and seeing what happened – but with no other method to suggest, that’s exactly what Ethan and his dad did (I stood as far back and possible, so as not to get in the way… ).
After a very small rockslide, and a little manoeuvring the concrete lintel went in above the front door:
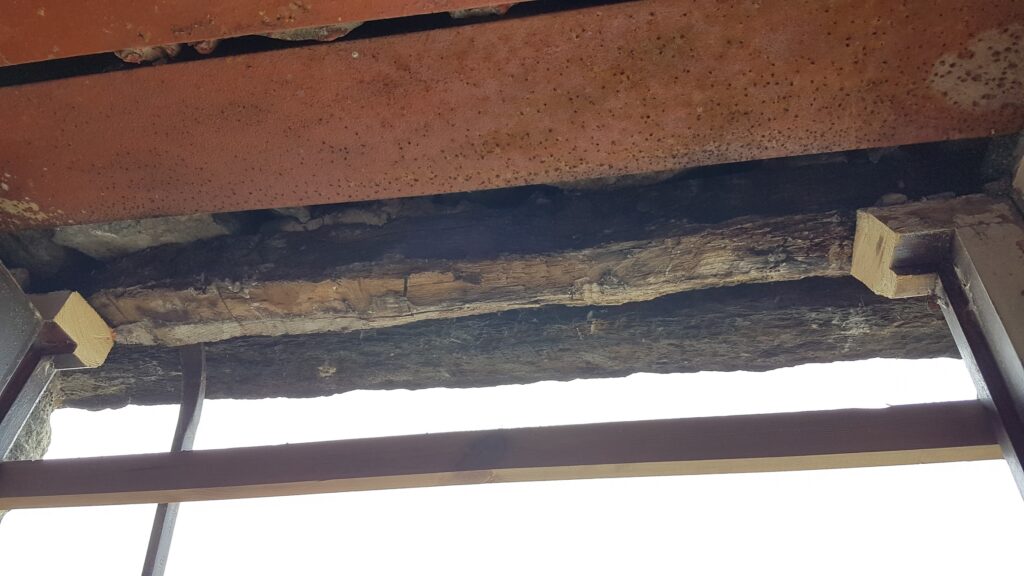
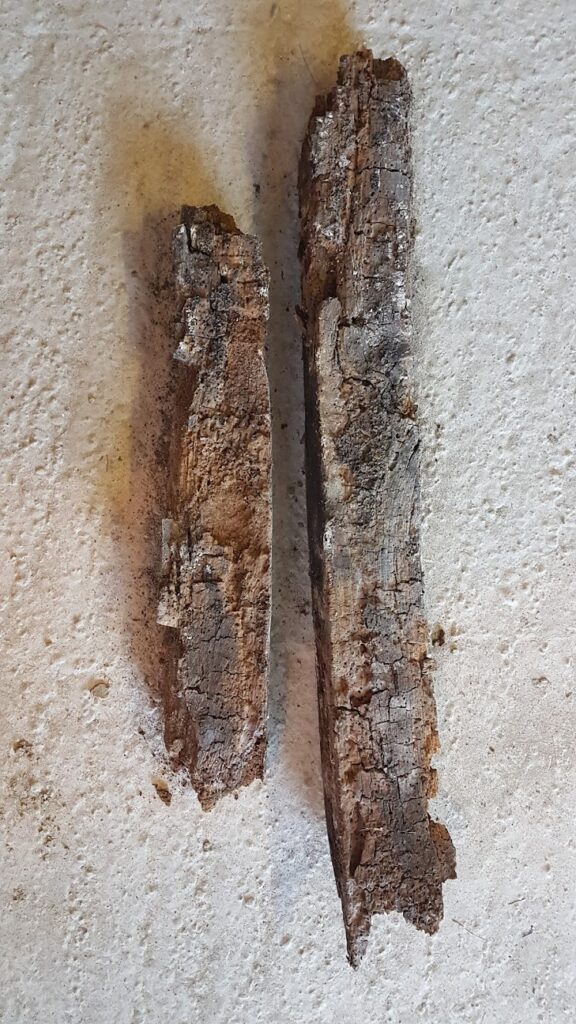
Old lintel 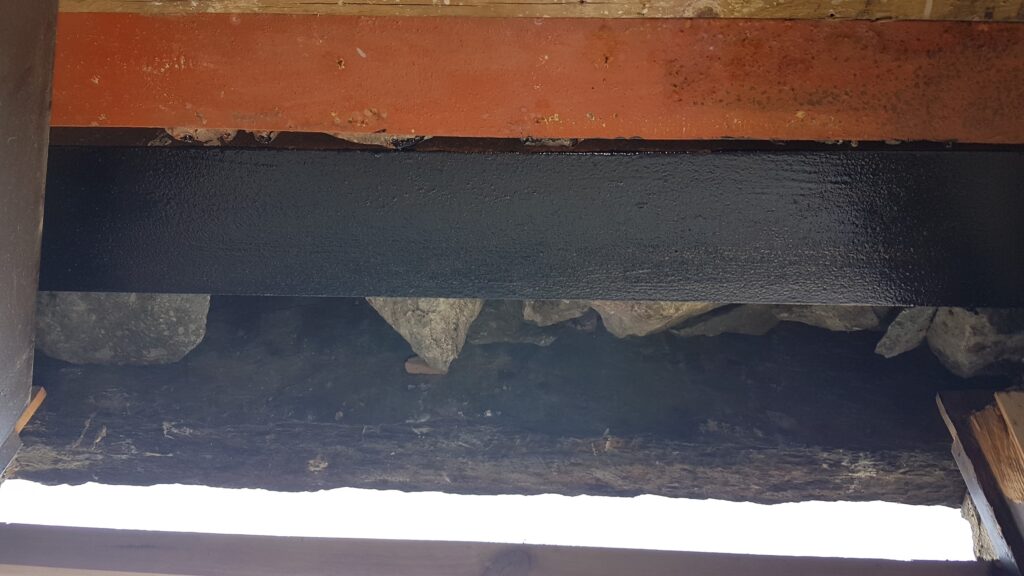
No lintel 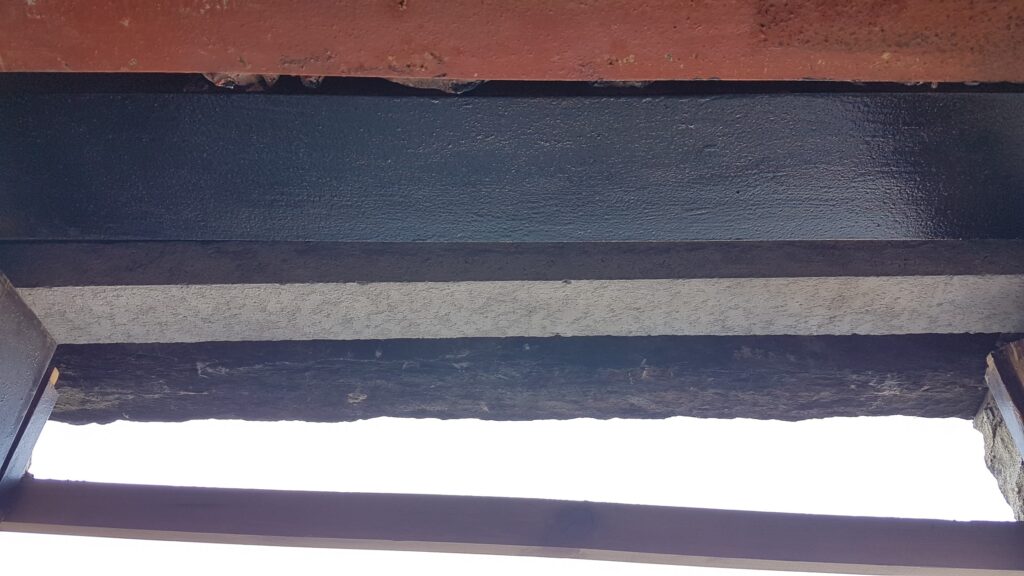
New lintel
I forgot to mention we threw a bit of Hammerite on this RSJ too, before removing the old lintel.
And here’s the dining room:

No lintel 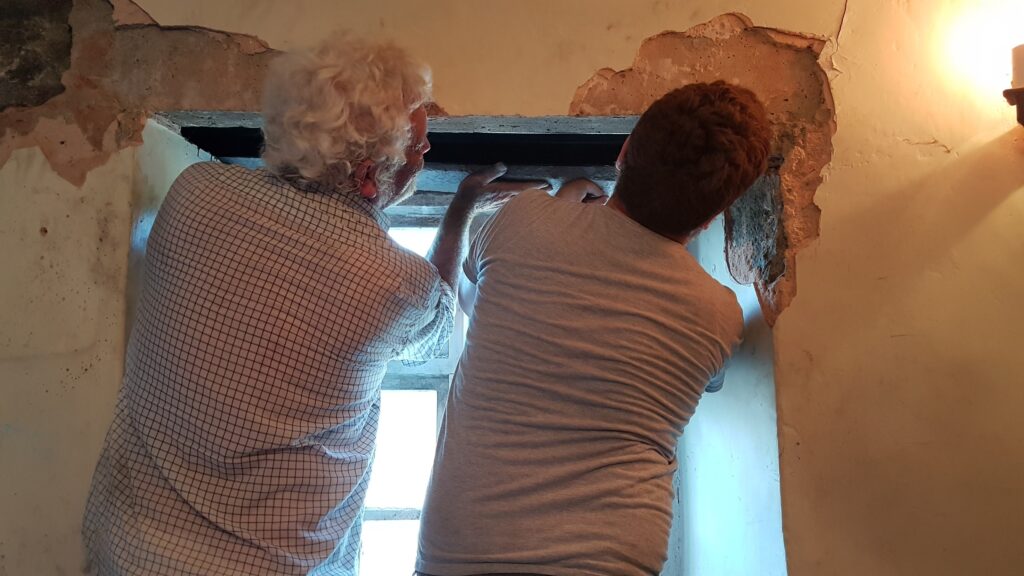
Putting in the new lintel 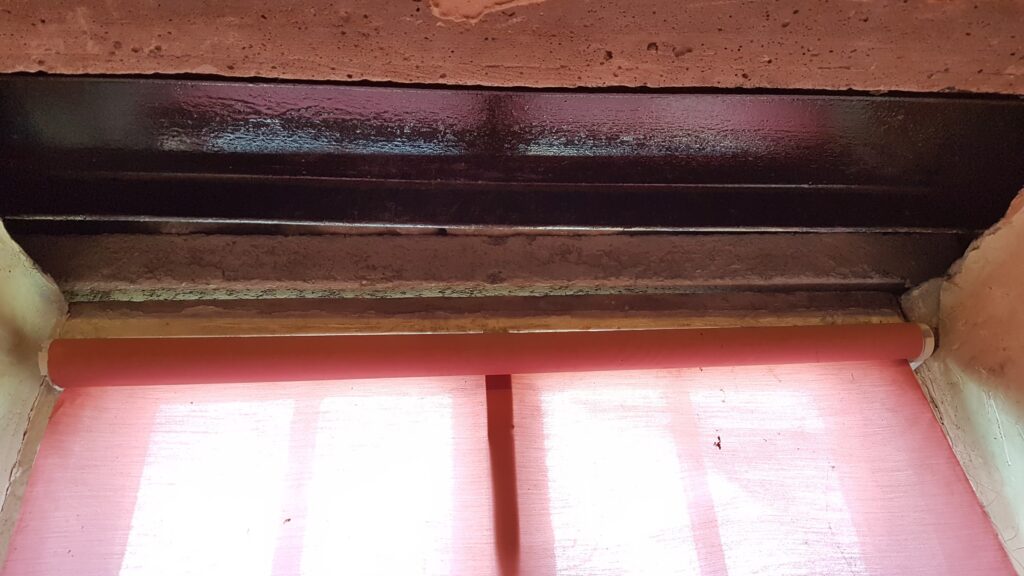
New lintel in place
Both lintel installations went surprisingly smoothly with limited wall collapse. The front door and the dining room window, both have a window above on the first floor, so there wasn’t a large amount of material in the wall cavity to begin with. We will probably fill in the gap from above before we install the internal window sills.
With the known lintel replacements complete, and the slate arrived, we then installed the new doorstep. Concerns were realised about the height of the internal floor, that had yet to be installed vs the bottom of the new door. We tried our best to adjust to account for this but in the end we’ll have to play it by ear – not our favourite method. Here’s the fancy new doorstep (already dirty) step, with the old front door that is now really on its last legs:

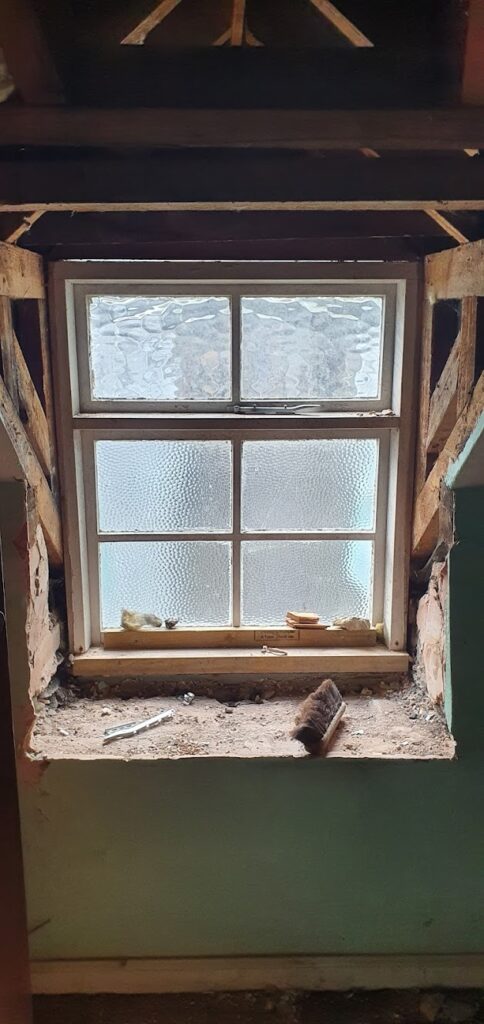
After all the bottoms of the openings were complete, and the most obvious of the tops were replaced, we stripped away around the tops of the two smaller bedrooms, the back door and the bathroom. We found that the two smaller bedroom windows had sufficient attachment points above, but both the back door and the bathroom had nothing. So we attached a new treated piece of wood across the top of each of the openings.
We also explored the rest of the bathroom dormer. Whoever built this dormer had clearly not considered that anyone taller may want to open the window at some point without smacking their head. I’m not the tallest and I have hit my head multiple times already. We were hoping to find that the dormer had a structure that would be fairly simply edited to allow for a vaulted ceiling, rather than flat, for a little bit of extra head space. It seems like it may be possible – but is likely a job for a much later date.
In exploring the dormers structure, we also removed the rotting fascias from the outside, to discover signs of woodworm in the frame. We have treated this and covered it back up with damp proof membrane for now! Another job that will likely be left to be done as a ‘finishing touch’.
Bathroom window inside 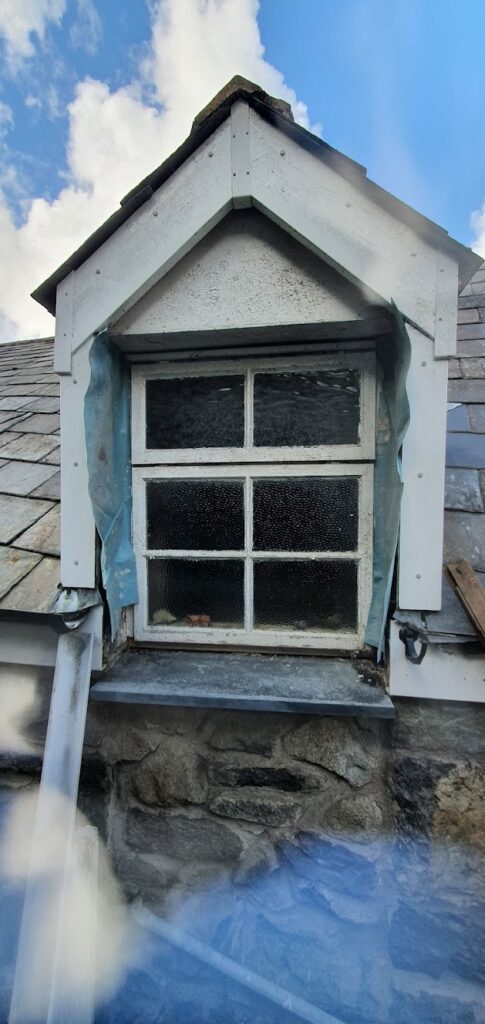
Bathroom window outside
The window openings were now all rectangular and had adequate support for the new windows. We were finally ready!
With a little time left, we started to attach the cavity membrane to the walls. We wanted the window installers to have a better idea of what we were trying to achieve when we asked them to put damp proof membrane around one of the windows.
Here’s a video of the first of many brick plugs going into our wall, with Ethan and his dad demonstrating their skill of never missing an opportunity to argue about something:
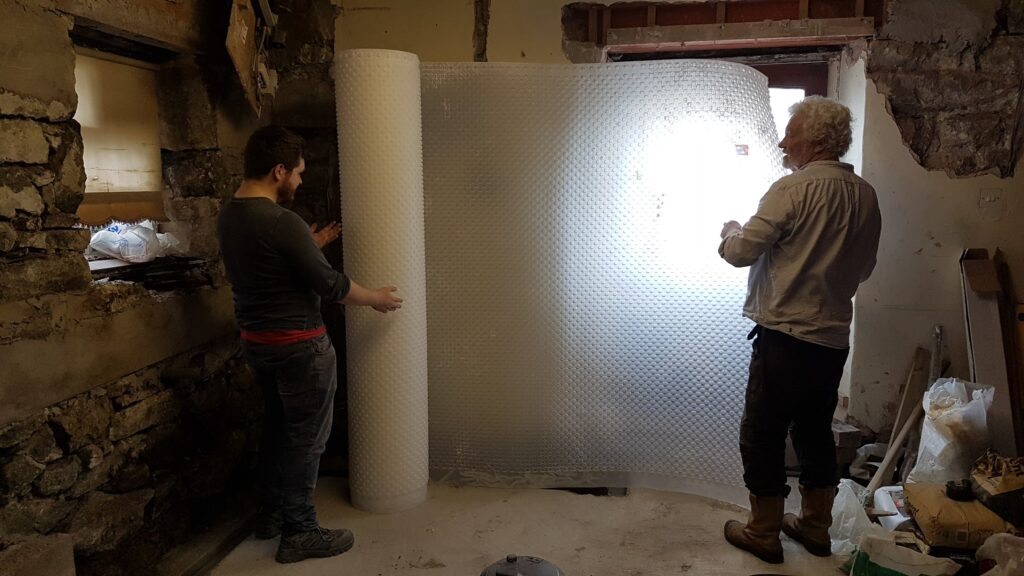
Rolling out the membrane 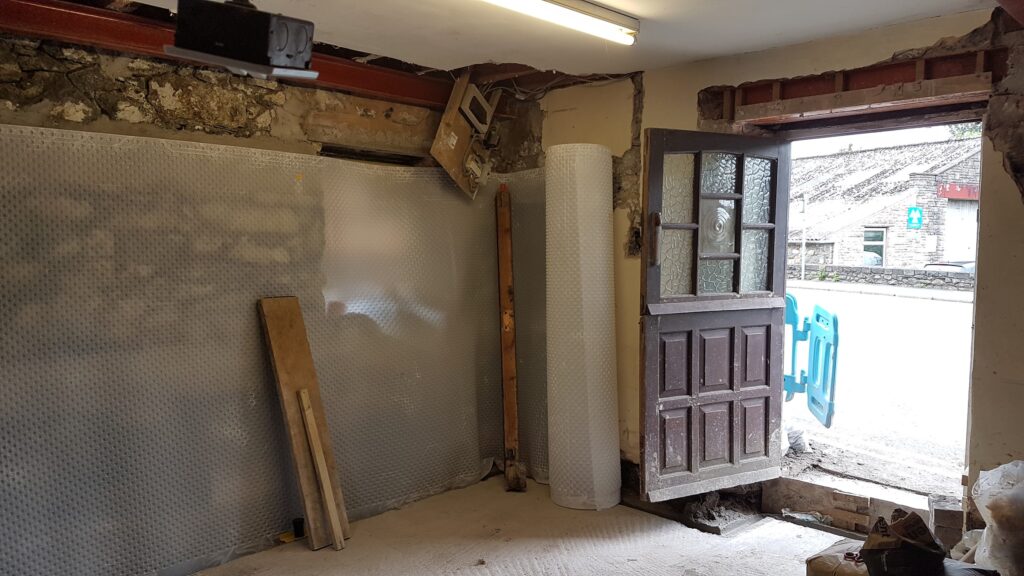
Propped against the wall 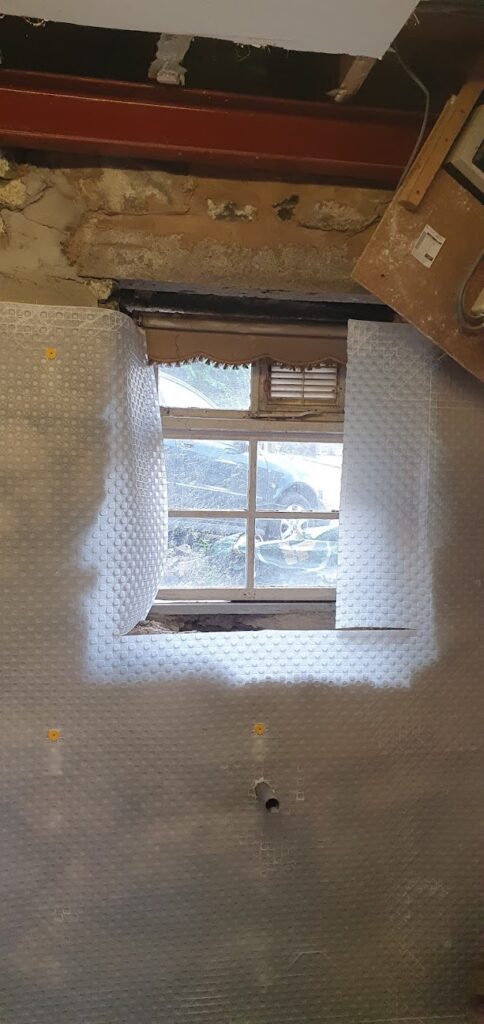
Kitchen window
With everything prepared for the new windows, our house was looking its best:

Hard to tell how it could possibly be improved! The next blog will be full of before and afters photos of its facelift.
Be First to Comment