In the background of all the floor frustration, we have been trying to obtain new windows and doors. These will replace 6 of our rotten wooden windows, and replace another with a back door. We’ll also be creating a new window in a new wall in place of the garage door, and replacing the front door. The current door requires a kick to each side of its frame before it will close, and a good shove upwards before it will properly engage the lock. While we are both happy to live in a work in progress, without secure windows and doors we would be risking not only our personal items, but the equipment provided by both our employers too. Not to mention, I can’t imagine any insurance company in their right mind being willing to cover us for contents.
Because of the long lead times on some window manufacturing and installation, we wanted to get in relatively early, get a variety of quotes and book someone in. We started booking people to quote around mid-April.
As we are in a conservation area, we wanted a style of window that would look as much as possible like timber, while being uPVC so that we could afford double glazing. We found that flush casements, with a white woodgrain texture were the most similar to the existing windows. We also needed georgian bars to be in keeping with the area. This narrowed our choices of suppliers and installer significantly, and we ended up going with one of the first companies we got a quote from.

We should have taken our very first delay as a warning sign, but we persisted nonetheless. Here is a timeline of our interactions (or lack there-of), and for those of you who love a gif, this should be right up your alley:
12/04: 1.5 hours of virtual consultation, quote given and then immediately dropped by 25%. We said we’d consider it as we were still shocked by the discounted price.

12/04-26/04: We tried to get other quotes, while receiving a call from the (finally) chosen company every couple of days to offer us a lower price. Each time we told them we were waiting on other quotes, and that we would like to see a physical sample of the type of window we had requested before we paid the deposit. Each time, we were reassured that when we paid the deposit, it would be taken “subject to sample” and the surveyor who came after this would bring one with him. On a call on the 26th of April, after the price had been dropped to 50% of the original quote(!), we told them we would be making a decision by the end of the week.

30/04: Decision made. We’d been told 8 weeks from survey to install to allow for manufacturing, and that the survey would take place within 2 weeks. Long wait, but they should be installed in early July, close enough to be a nice birthday present for Ethan from himself.

30/04-27/05: Radio silence. Each week Ethan called their sales number, requesting that someone call us back so that we could accept the quote, book and survey and ask a couple of final questions. We were assured that THIS time someone would get back to us ASAP. We received no calls. We started looking for more window companies, as clearly they did not want us as customers.

28/05: Our faith was somewhat restored as we finally were given a useful response. Instead of promising a callback, the agent on the phone gave us an email address. After emailing, we did eventually receive a phone call, and some answers to our questions. The bad news: the wait time had now increased to 10 weeks; approx. install date: mid August.
02/06: We paid our deposit and booked in a survey for the following week. They wanted to come in two weeks time, but we weren’t having it after their initial delays.
09/06: The surveyor came and measured all the windows. We made a couple of changes to the original request – switched to traditional hardware for the front door, added an additional opener in the dining room, and changed the back door to a different product range so that we could have the sizes that we wanted. We were told that a couple of these changes would cost extra, so we would receive an updated price shortly after the survey. Oh, and contrary to every previous conversation, surveyors NEVER carry window samples, but not to worry, he’d get a salesperson to bring one to us ASAP.

06/07: Apparently ASAP was four weeks later. We had offered to travel to a showroom, or to a property where they had previously installed the windows to speed things up, but it didn’t seem like they’d even attempted to gain permission from one. The surveyor brought it. The sales team claimed that they had not and would NEVER say that the surveyor would bring a sample to the survey. Still, the sample was fine, and we signed the spec and sent it off for manufacturing. New approx install time: mid-September.
Ethan’s birthday came and went, and we received no confirmation of receipt. Ethan began to call every few days for an update asking for a new price and confirmation that the windows were now in manufacture – a reassurance no-one could give.

28/07: Three weeks had passed and we finally got through to the ‘local’ branch. They told us that they were simply waiting for us to send evidence that we had planning permission for our ONE new window before they could start manufacture for ALL our windows and doors. No-one had thought to tell us that they needed this document that we had had in our possession since the 17th March, let alone to give us a quick call or email to ‘remind’ us after 3 weeks of them apparently “waiting” for us to send it.
The only time planning permission had previously been mentioned was during the survey where the conversation went like this: “Do you need planning permission?” “Only for the one new window, and we have already got it” “Great”. We immediately sent our evidence and were told on the phone that the approximate installation date would be mid October. Ethan was more than a little mad, and I immediately had another breakdown. He reminded them of the several weeks of chasing we had had to do, and the delays that their company had caused to us being able to actually live in our home. She said she’d see what she could do.

30/07: We received a phone call regarding the installation. We have been provisionally booked in for installation starting 20th September, pending a scaffolding company being booked. IF this goes ahead we may FINALLY be in a position to move into our house on the weekend just before my 32nd birthday.
Also, no price adjustment needed to be made apparently. I hope they are as inefficient at asking for final payment as they have been throughout the rest of the process. Fingers crossed the manufacturers and installers are somewhat more competent. We haven’t received any written confirmation of the installation date either.

Oh hey, were you expecting this to be a renovation post? Well, now you’ve paid your dues reading my frustrated rant, here are some updates on the renovations surrounding the windows.
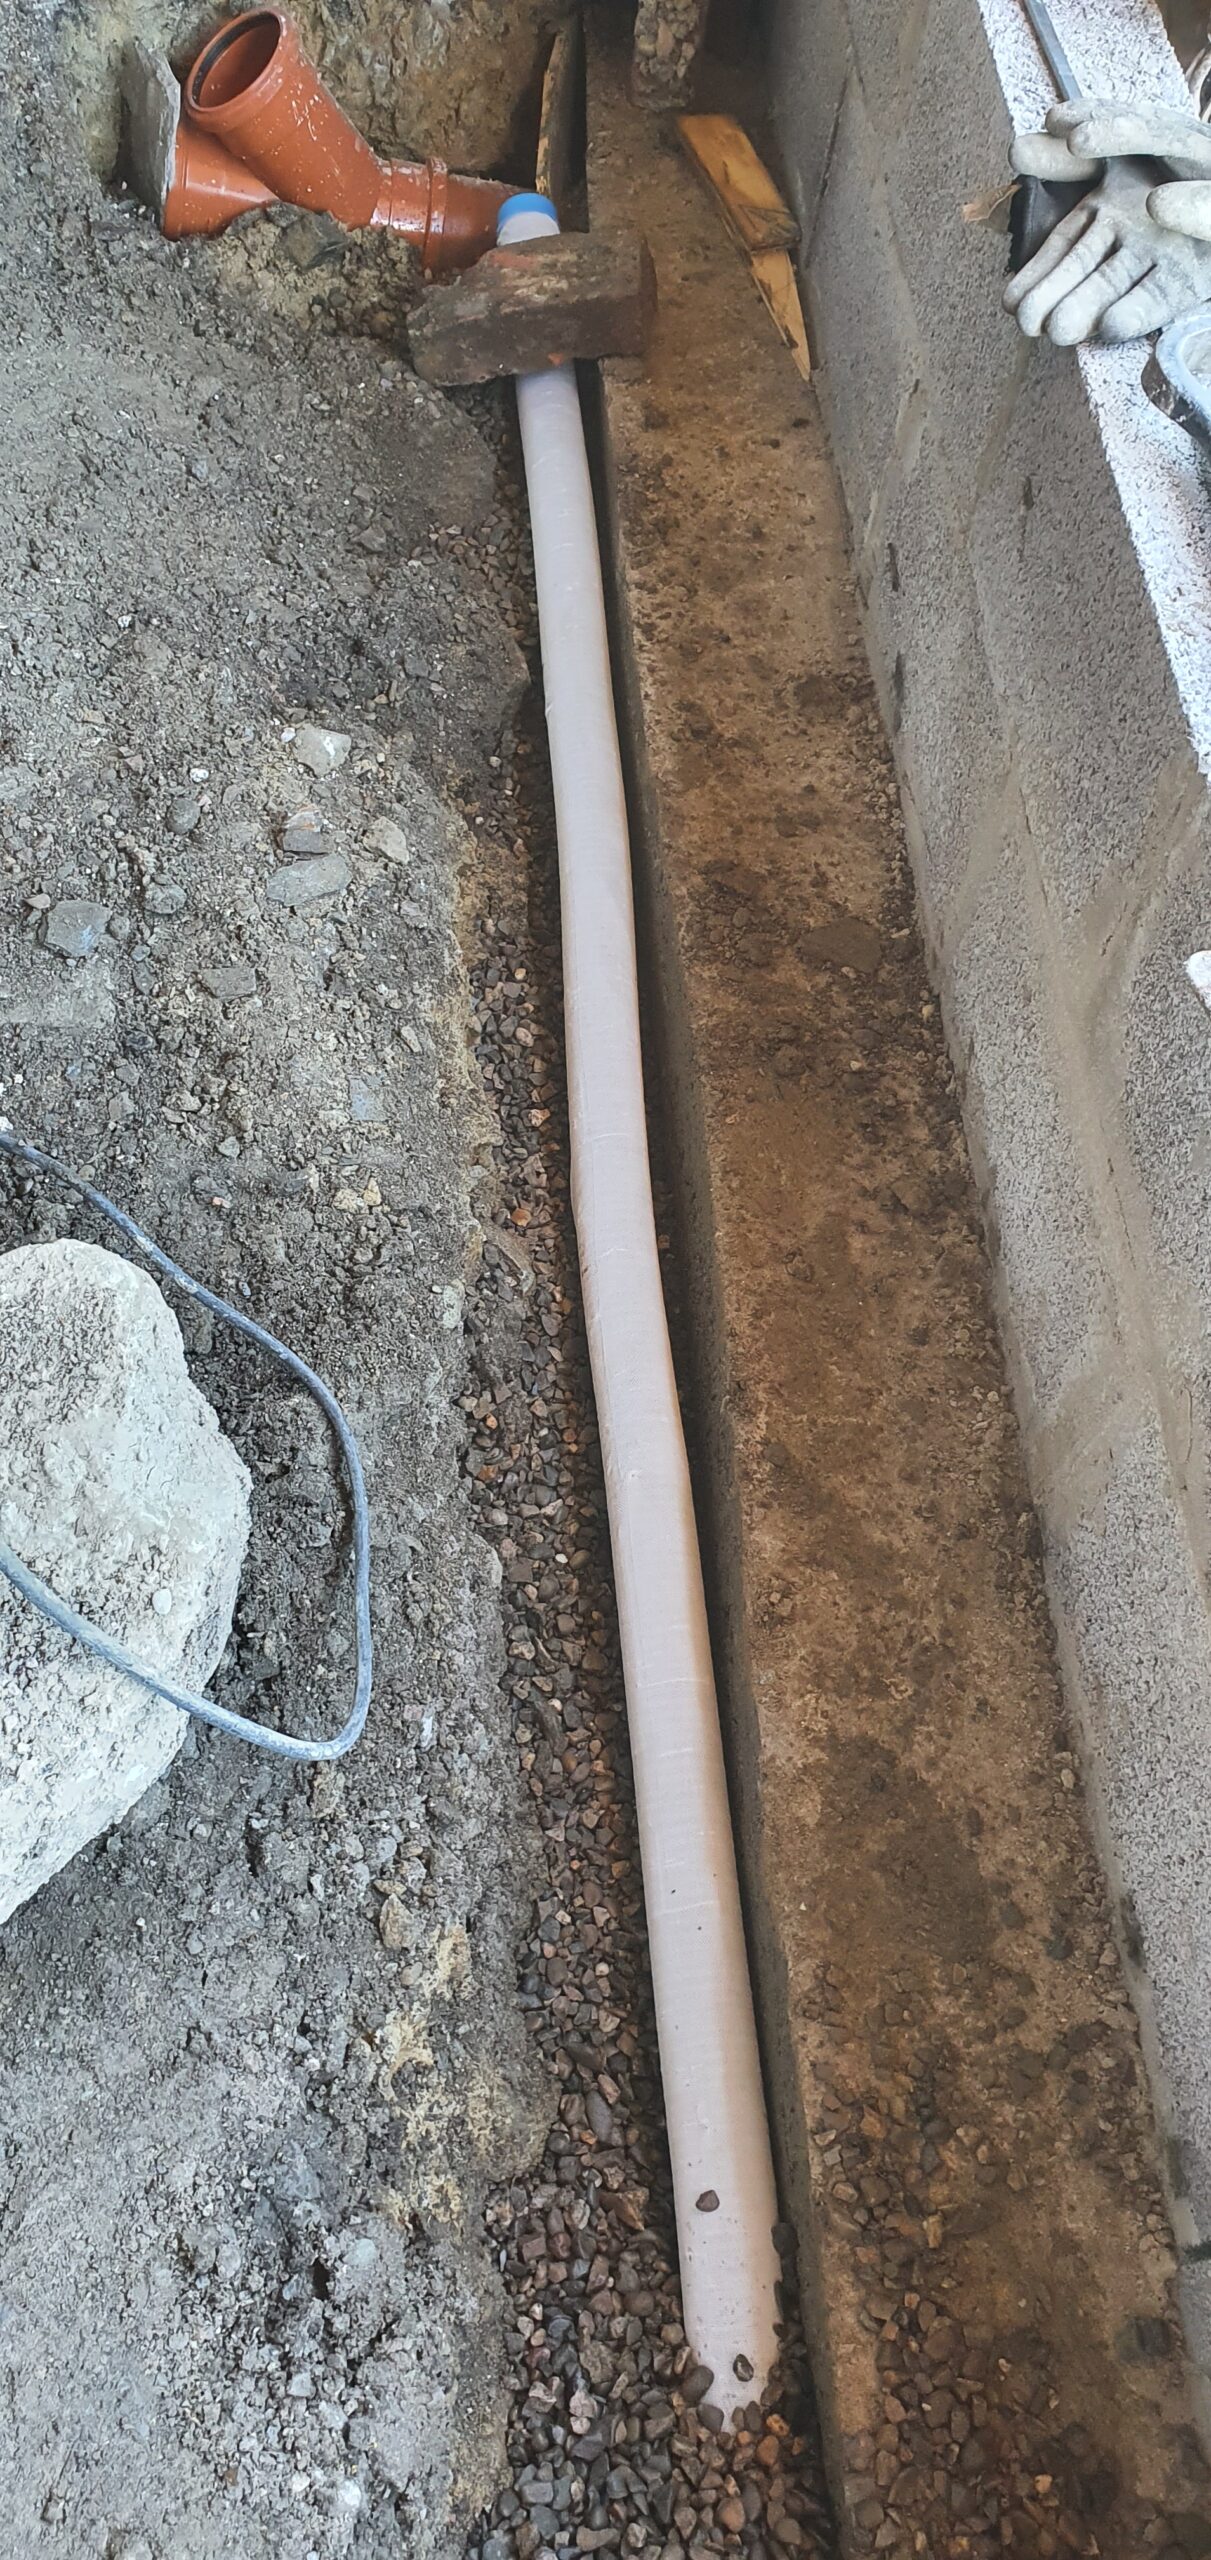
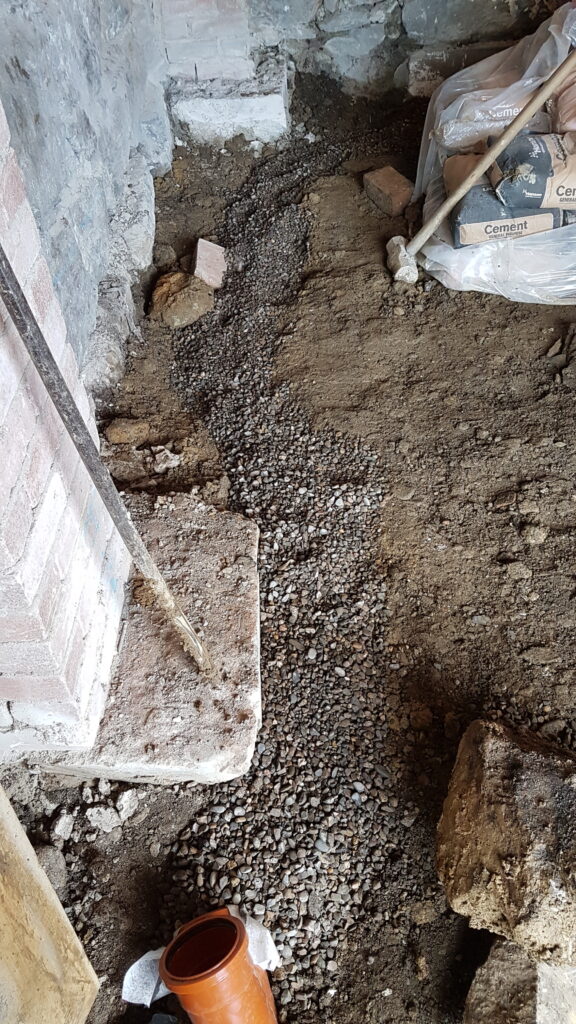
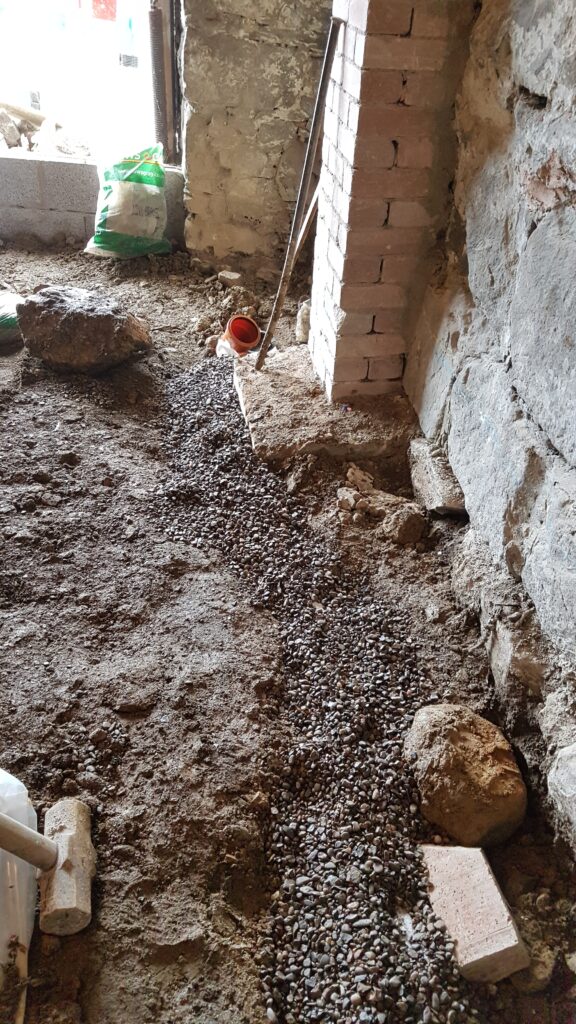
When we finally had the surveyor booked in, we thought we ought to make some changes to help with measuring the windows apertures. This mostly entailed replacing the old, bitty window sills with new ones. We chose calibrated slate from the builder’s merchant, and cut it down to size using the grinder (my hatred for loud noises ever increasing). We chipped out the old broken up slate sills, trying to leave the old wooden frames in place. This was (mostly) successful.
For the kitchen and dining room windows, to make space for the new sill we had to cut the bottom of the frame off. This lead to quite a precarious situation in the kitchen, even once the new sill was back in, and we have since had to use sandbags and various pieces of wood to keep the window from falling out.
Kitchen with old sill chipped away, and frame cut 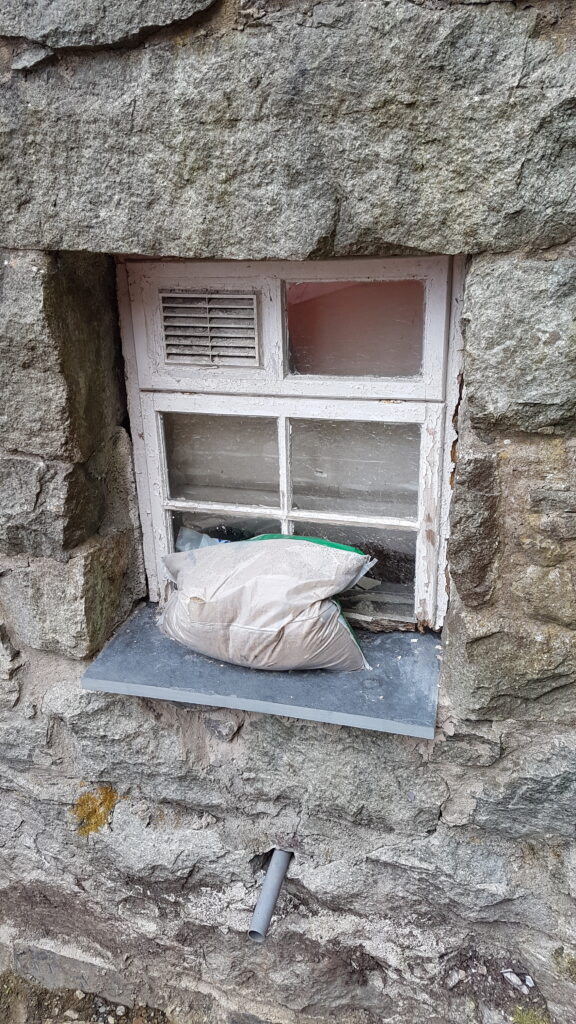
New sill in place, with sandbag to hold the window in
Dining room window with old sill chipped away and frame cut 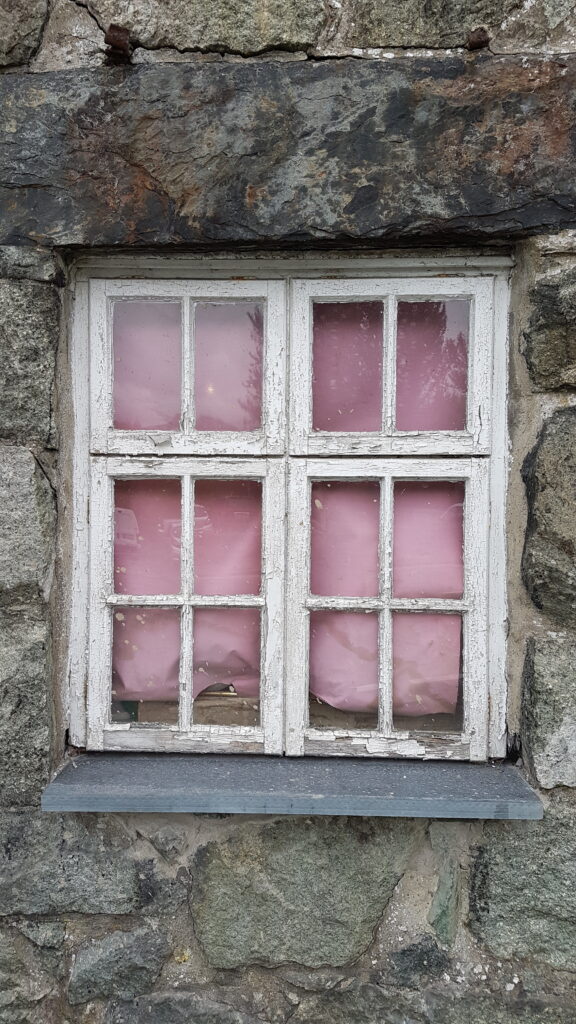
Dining room with new sill installed
When we started on the wide bedroom window, we saw it drop every time we chipped away another piece of the existing sill. We thought it best to leave it until the windows were almost ready to go in before we lose this window completely and have to board up more of our house. Four out of six of the windows sills were done, and this was enough to give us a good idea of what height needed to be left for those we hadn’t yet managed to replace when ordering the windows.
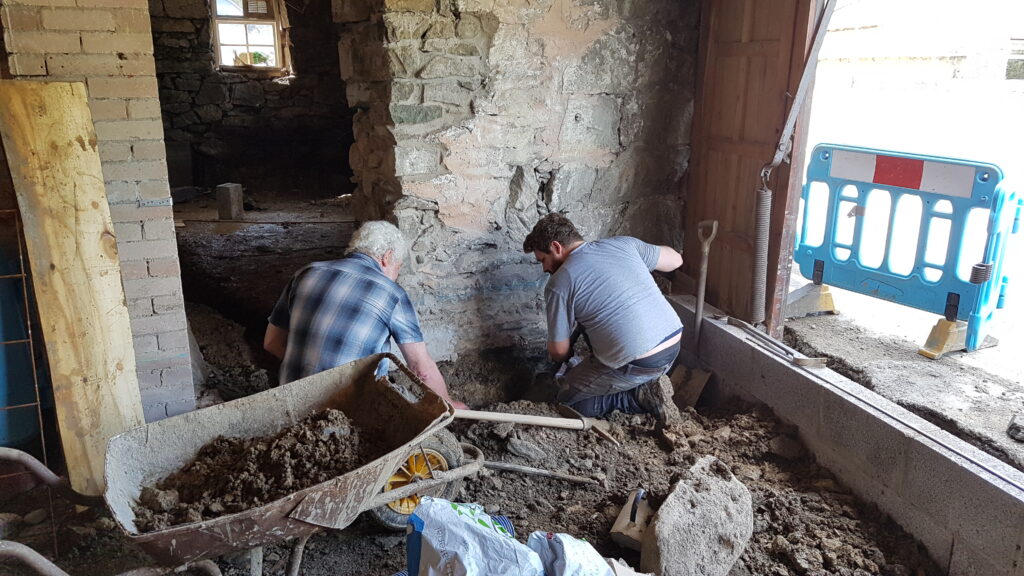
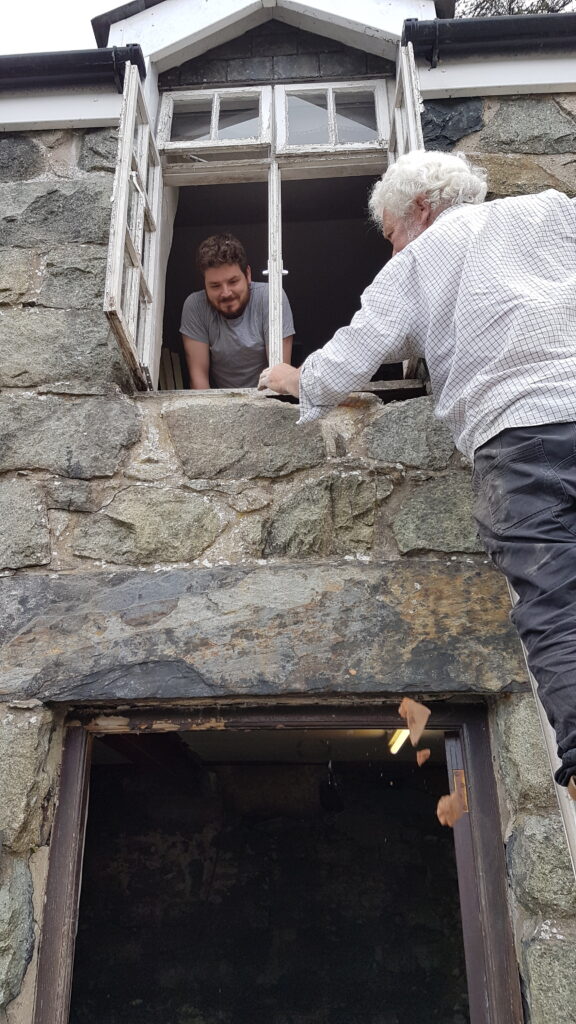
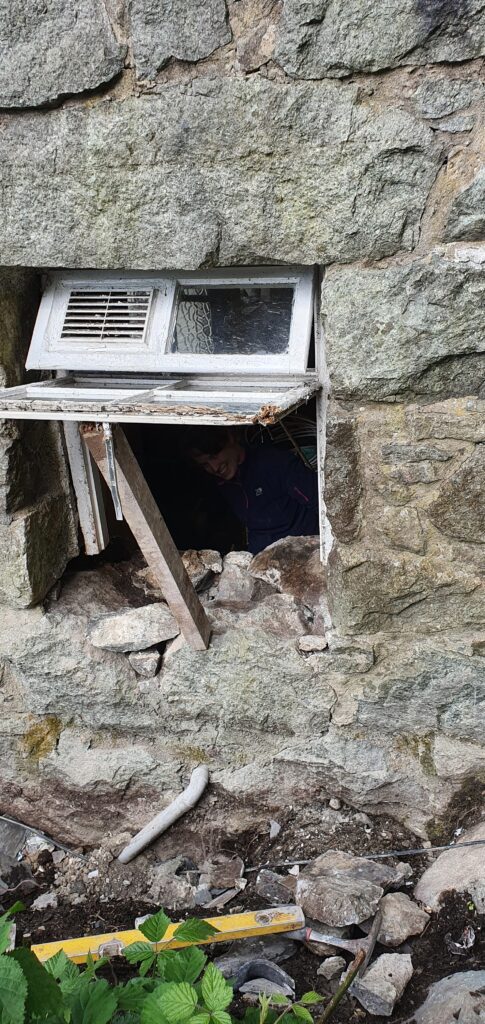
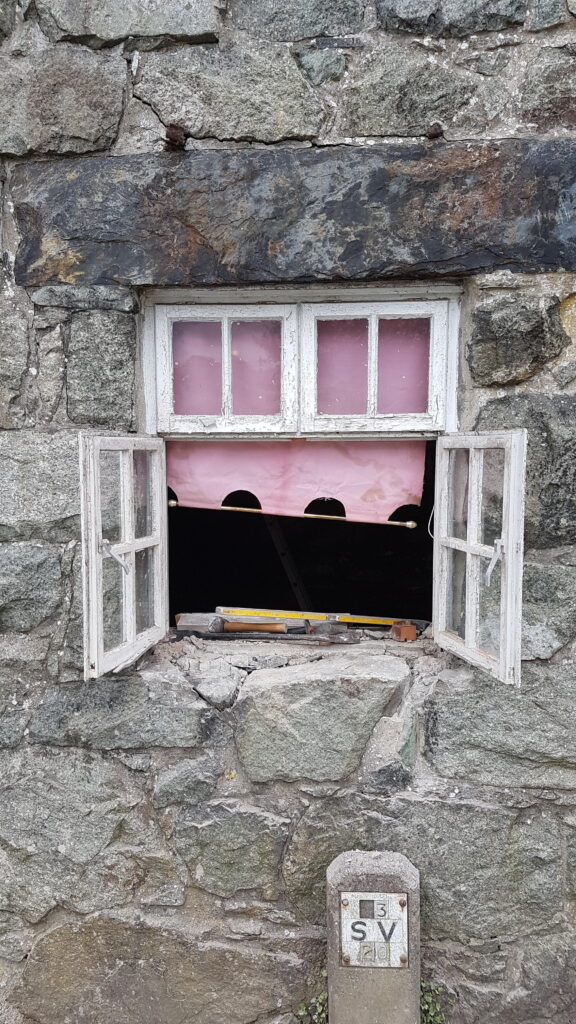
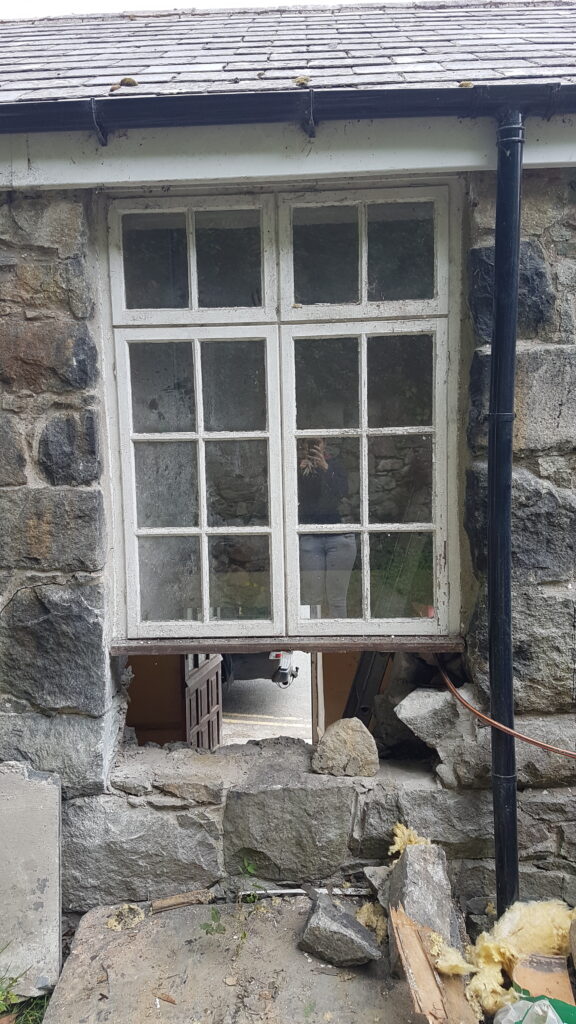
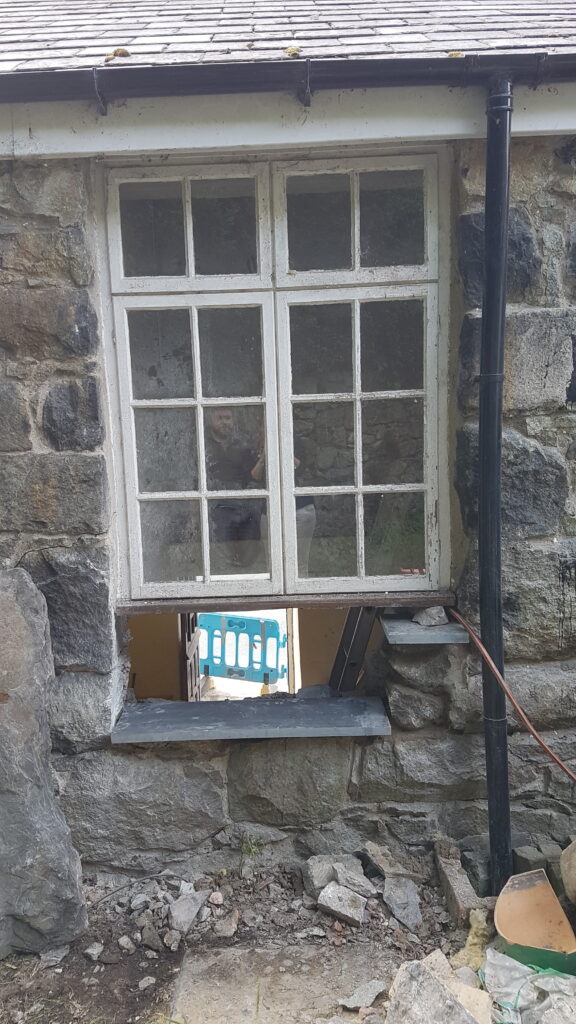
The large window on the 1st floor is to be changed into a back door. Below this window there were a few large stones that could have limited the size of the opening. So before we could allow the window company to take measurements, we needed to enlarge it, and see what opening we ended up with. We started by removing stones, including the giant piece of slate on top of the wall. This took the window from this:
Outside 
Inside
Via this:

Internal wooden sill removed to reveal slate and stone 
Most of the stone removed
We plan to have a full glass, georgian paned door in this opening. We could either make the opening rectangular, with one of the lower corner panes having a lovely view of the end of one of our new steel beams, or give it one tall section for a door, and a shorter section for a window. We decided to go with the latter.
There was still a large stone sticking out into the opening that could not be removed from the rest of the wall. So Ethan and his dad took to it with various tools including a grinder, a lump hammer, a bolster chisel and a sledgehammer. Because of the loud noises, and us only owning one set of ear defenders between us (something that has since been rectified), I ran away and hung around at the front of the house (looking suspicious to passers-by), particularly when the grinder was in use.
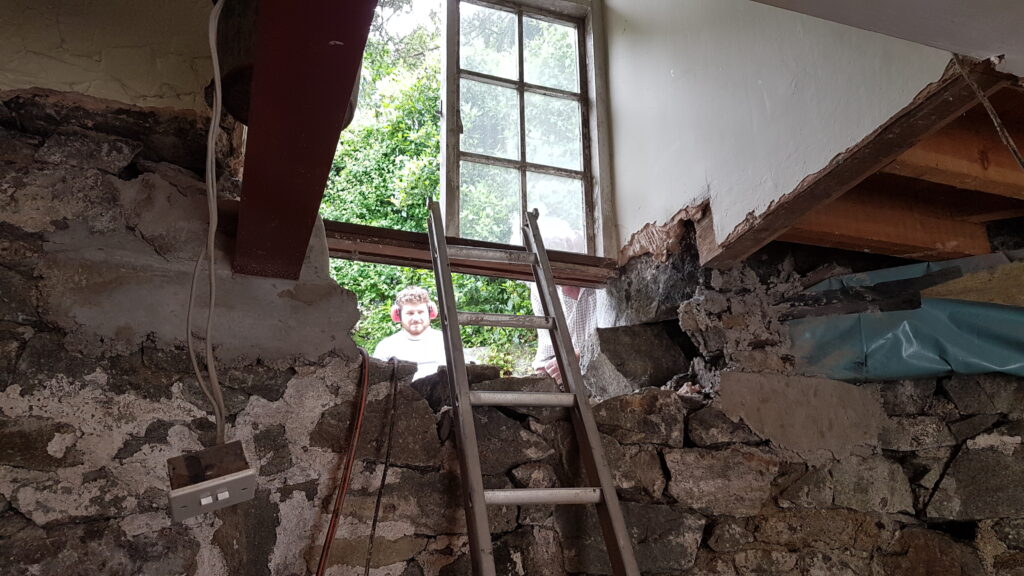
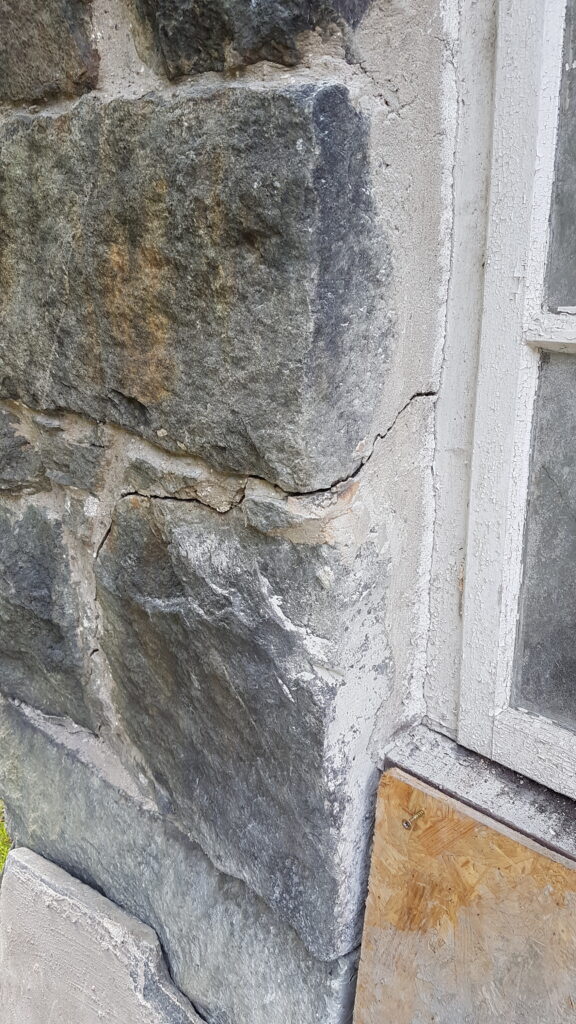
Because of the small size of the disk of the grinder, it couldn’t get through the depth of the stone. So they made various cuts to try to take chunks out of the stone, and perhaps weaken it in the direction where they wanted it to break. They then used the various other tools to try to knock off the weakened parts. While this method was eventually successful, part way through the ordeal, I decided to go and take a look from outside – and had to inform them that their sledgehammer hits were in fact slowly moving the whole stone sideways out of the corner of the house, and that the stone above appeared to have cracked out of its pointing. We’ve decided the house is still stable though.
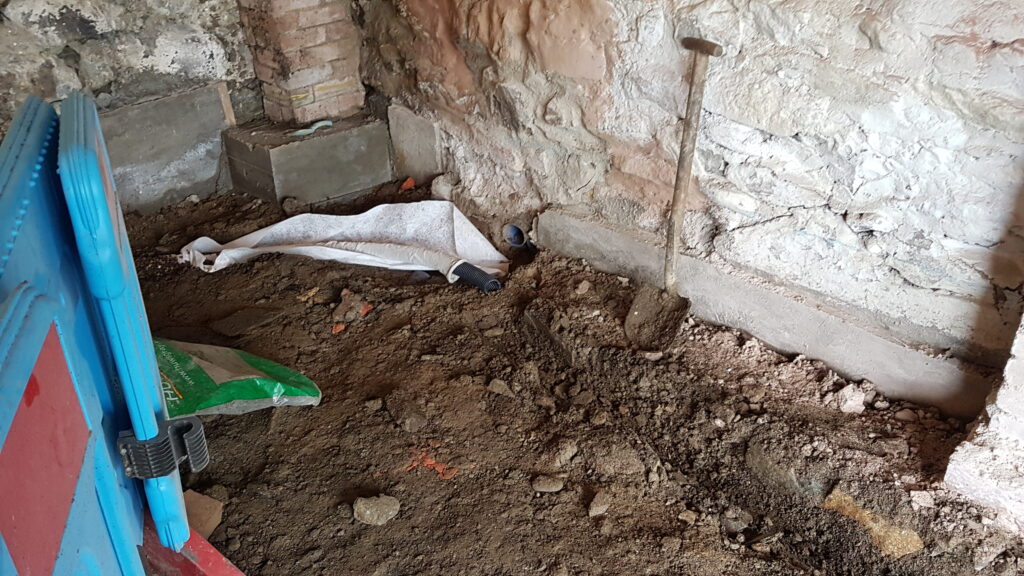
In the end we had a door opening that looked like this:
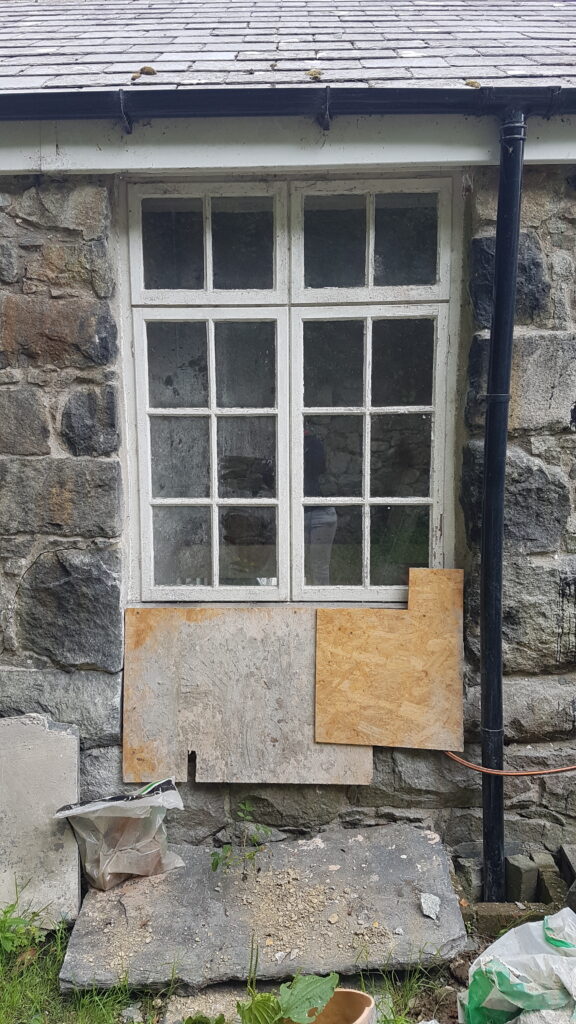
The window has thankfully stayed put, so we could screw boards to its frame to at least give the illusion of security until our new door is installed.

So we did just that – boarded it up, and ignored it for weeks. But today, we (mainly Ethan’s dad, with us micro-managing) finally squared off the stonework and installed sills for both the door and the ‘cheek’ window. Hopefully they are perfectly separated in height to have the new georgian bars in each section align.
We do like the new sills, but they perhaps need a bit of wear before they look like they fully fit with the property. We’ll see if we have the energy for that once we have done all the other jobs.